
Most xMatix business records use the same three-part journey: locate a record in an entity list, enter the new record's core and tabbed fields, then work from a detail page that brings the record's related processes together. This guide uses Account because it demonstrates the entire pattern. Other entities may expose fewer tabs, different fields or additional actions, but the way you search, create, open and move between tabs remains consistent.
Procedure
Step 1 — Read the entity list
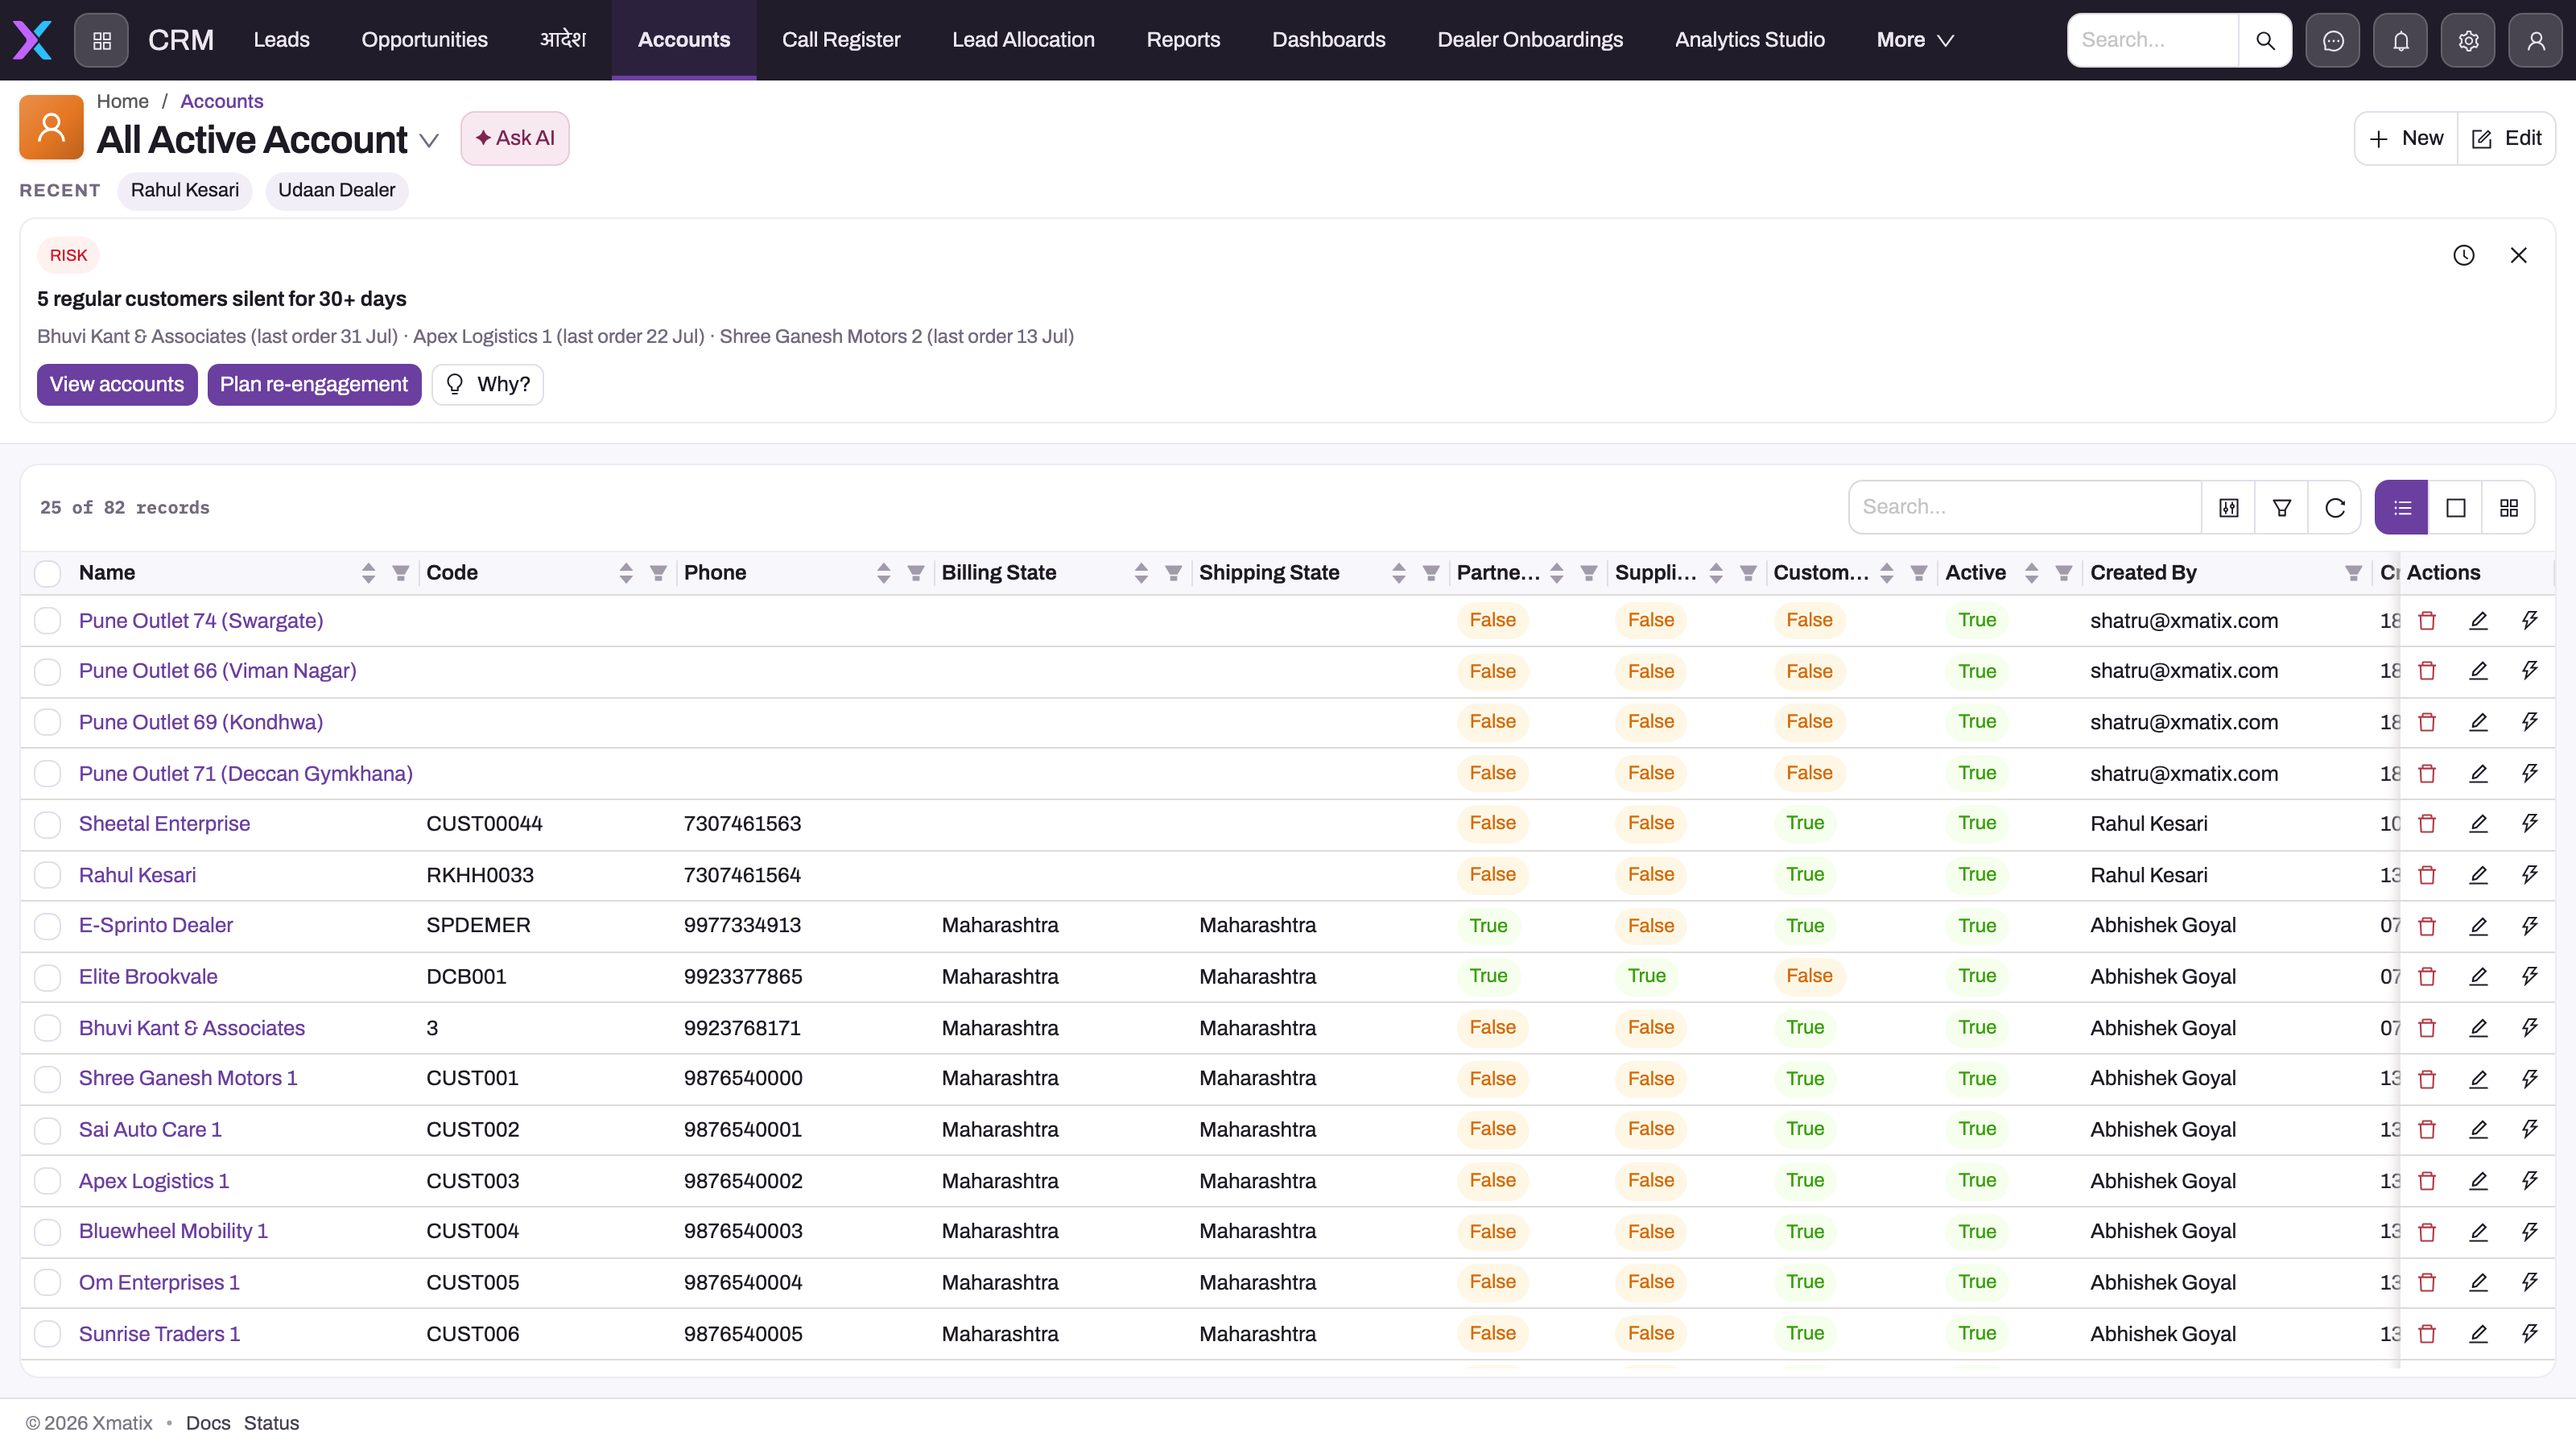
- 1
The heading and selector identify the Account entity and active saved view.
- 2
Summary and insight areas explain the population before you act on a row.
- 3
Search, filters, refresh and display controls reshape the list without editing records.
- 4
Linked names open the selected Account detail page; visible rows are synthetic demo2 records.
- 5
New starts a record while Edit applies to the current entity context.
The heading and view selector identify the entity and the active saved view. Summary cards describe the current population, while search, filters, refresh and column controls refine or reshape the grid without changing records. Each visible row is real synthetic demo2 data: names, types, ownership and other values are intentionally shown so you can see how a populated list behaves. Select a linked record name to open its detail page; choose New only when you have confirmed the current entity and view are the intended ones.
Step 2 — Enter the Account header and Classification fields
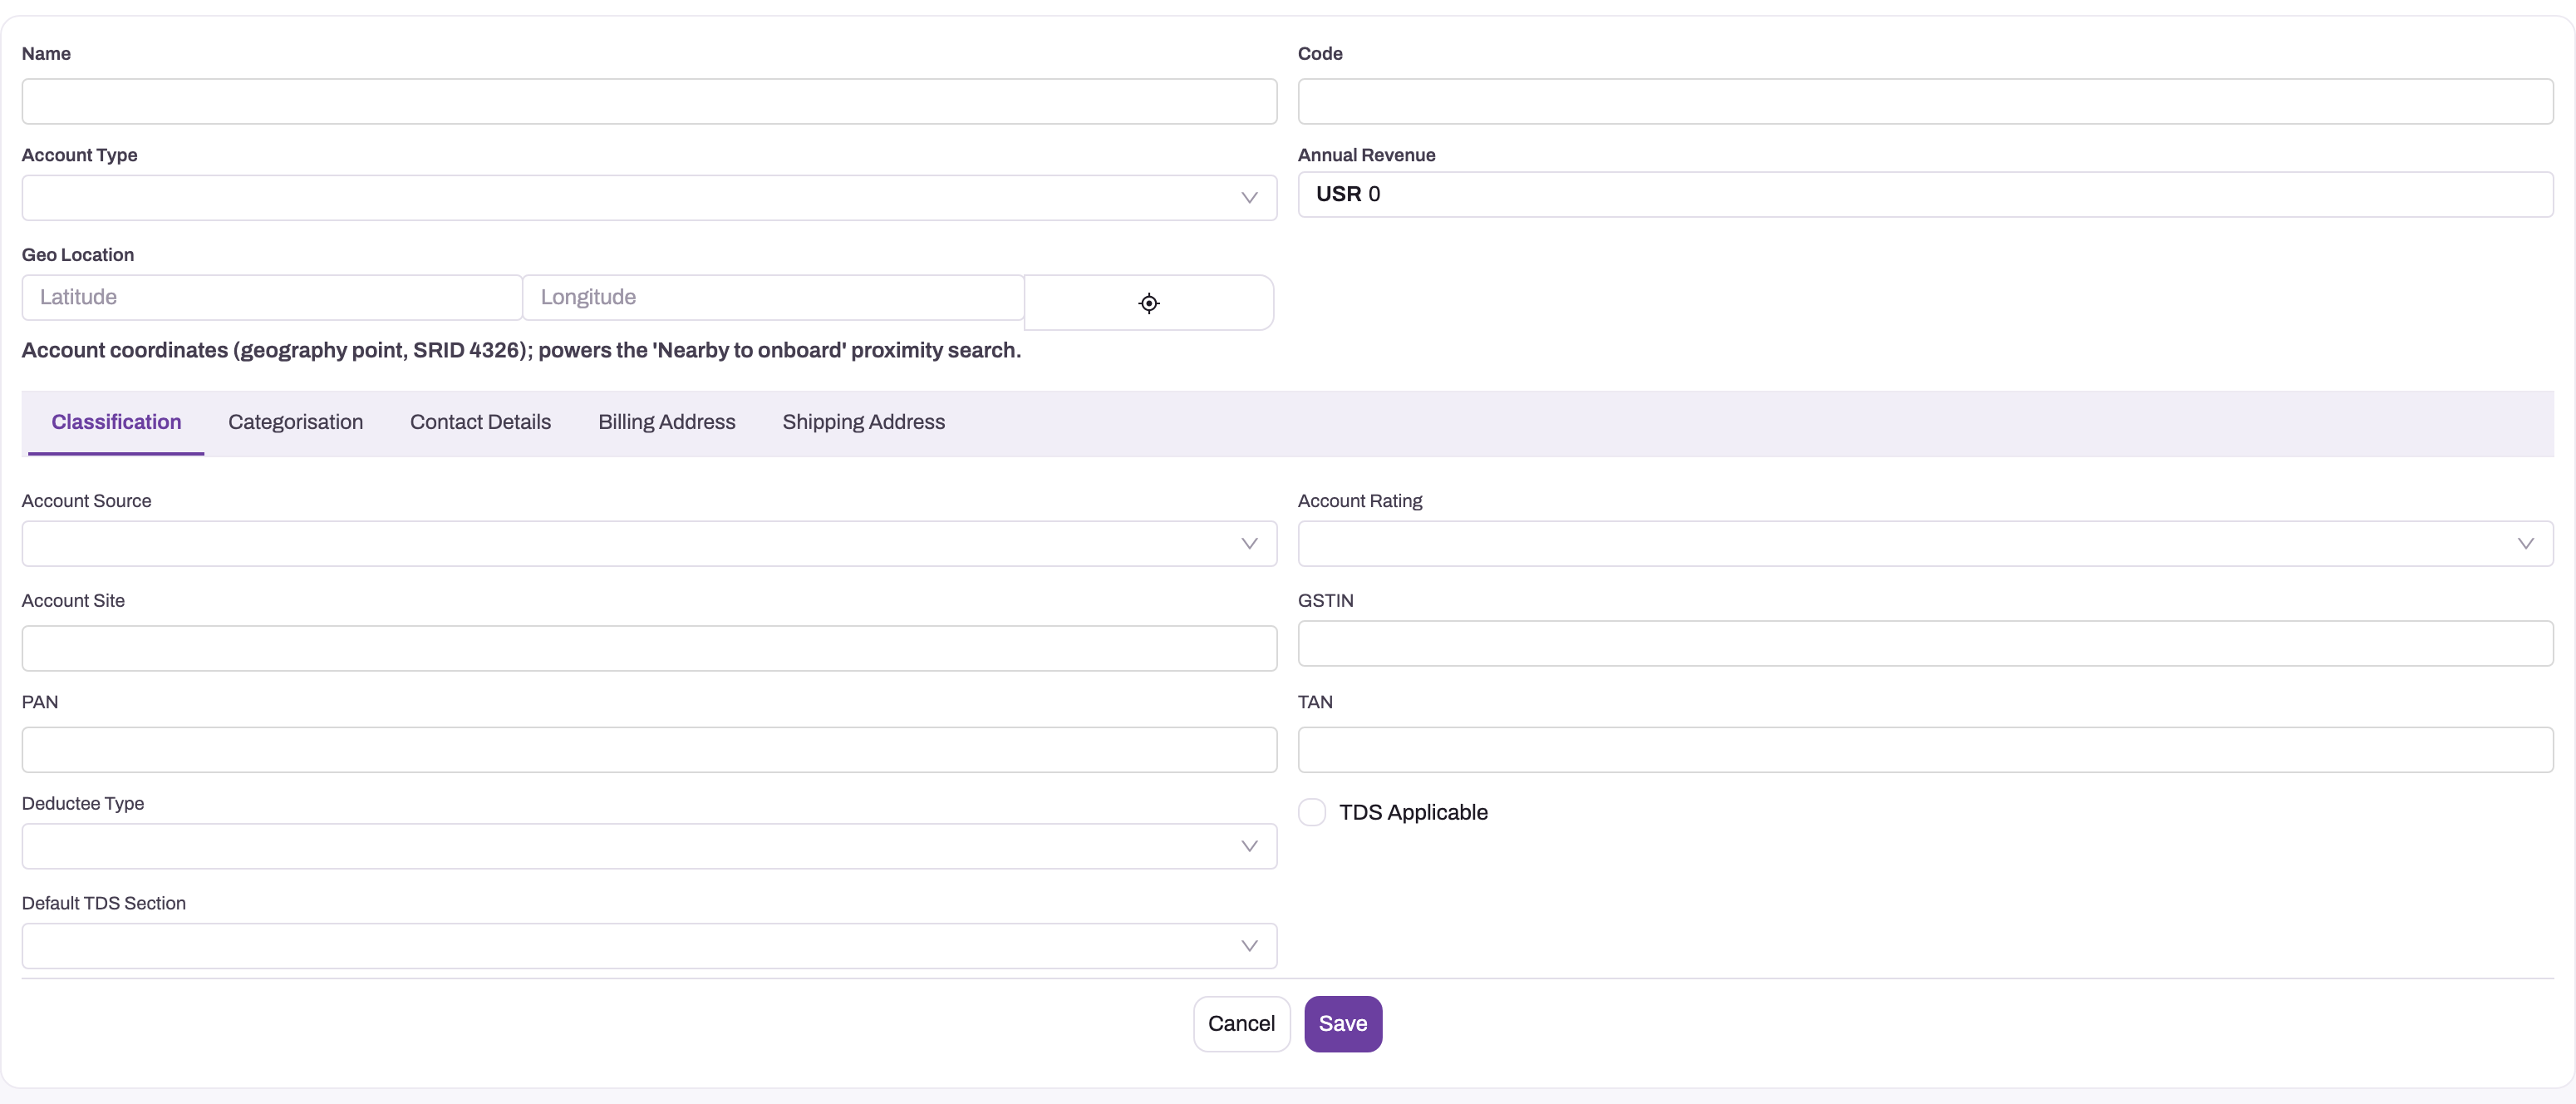
- 1
Name, code and account type establish the party's identity before role-specific fields.
- 2
Classification is selected; the remaining tabs must also be reviewed before save.
- 3
Source, rating and site describe how the account entered and is classified commercially.
- 4
GSTIN, PAN, TAN and TDS controls can affect downstream tax and withholding behavior.
The untabbed header holds the account's identity and commercial type: name, code, account type, revenue and location. The Classification tab adds the source, rating and site plus statutory identifiers and withholding-tax controls. Complete these values from an authoritative source. GSTIN, PAN, TAN and TDS choices are not descriptive notes; downstream tax, invoicing and withholding behavior can depend on them.
Step 3 — Set the account's operational roles
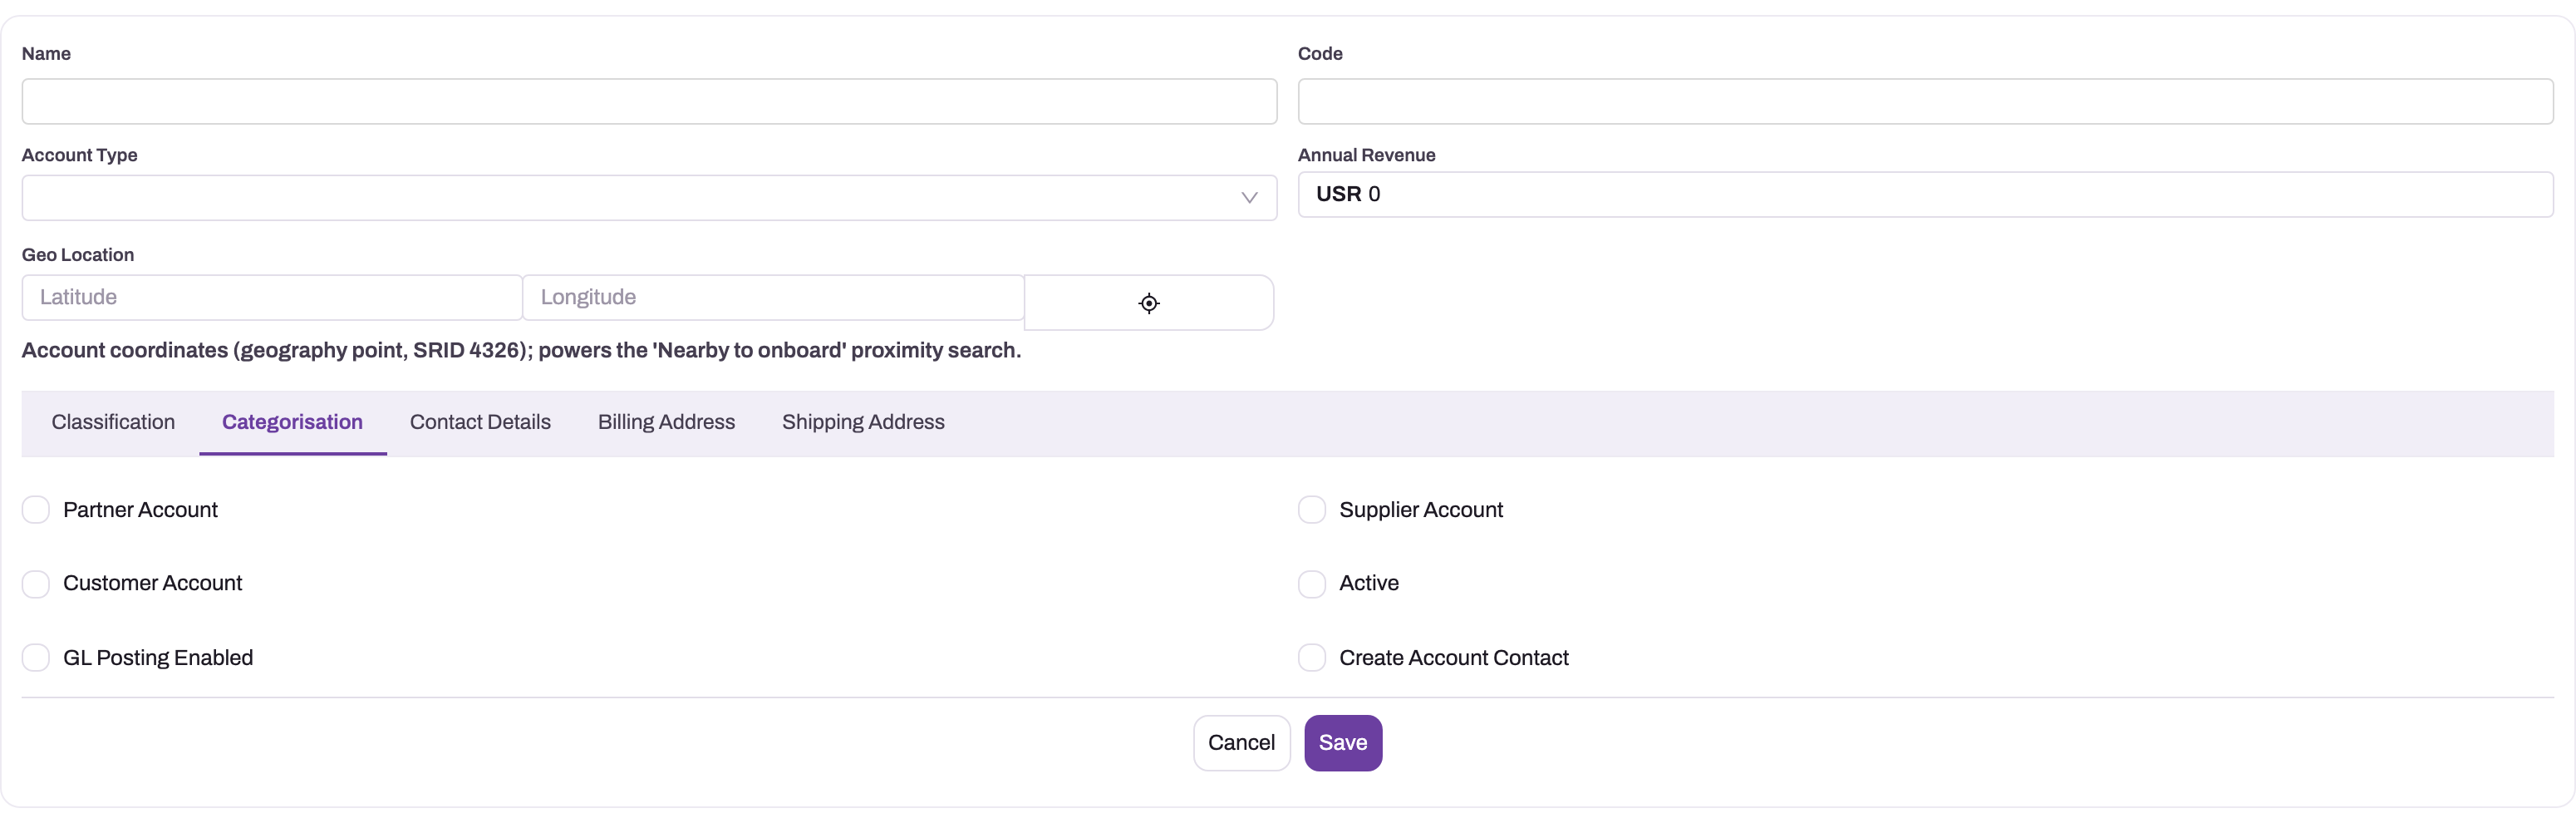
- 1
The selected tab is part of the same unsaved Account form; header values remain in context.
- 2
Partner, supplier and customer flags may be combined only when the party performs those roles.
- 3
Active and GL Posting Enabled control ordinary availability and accounting use.
- 4
Create Account Contact uses the Contact Details tab to create the first related contact.
The Categorisation tab determines whether the same party can act as a partner, supplier, customer or any combination of those roles. Active controls ordinary availability, GL Posting Enabled allows accounting use where configured, and Create Account Contact tells the create flow whether it should also build a contact from the contact tab. Select only roles the relationship genuinely performs; role flags change which lookups and processes can use this record.
Step 4 — Capture the first contact
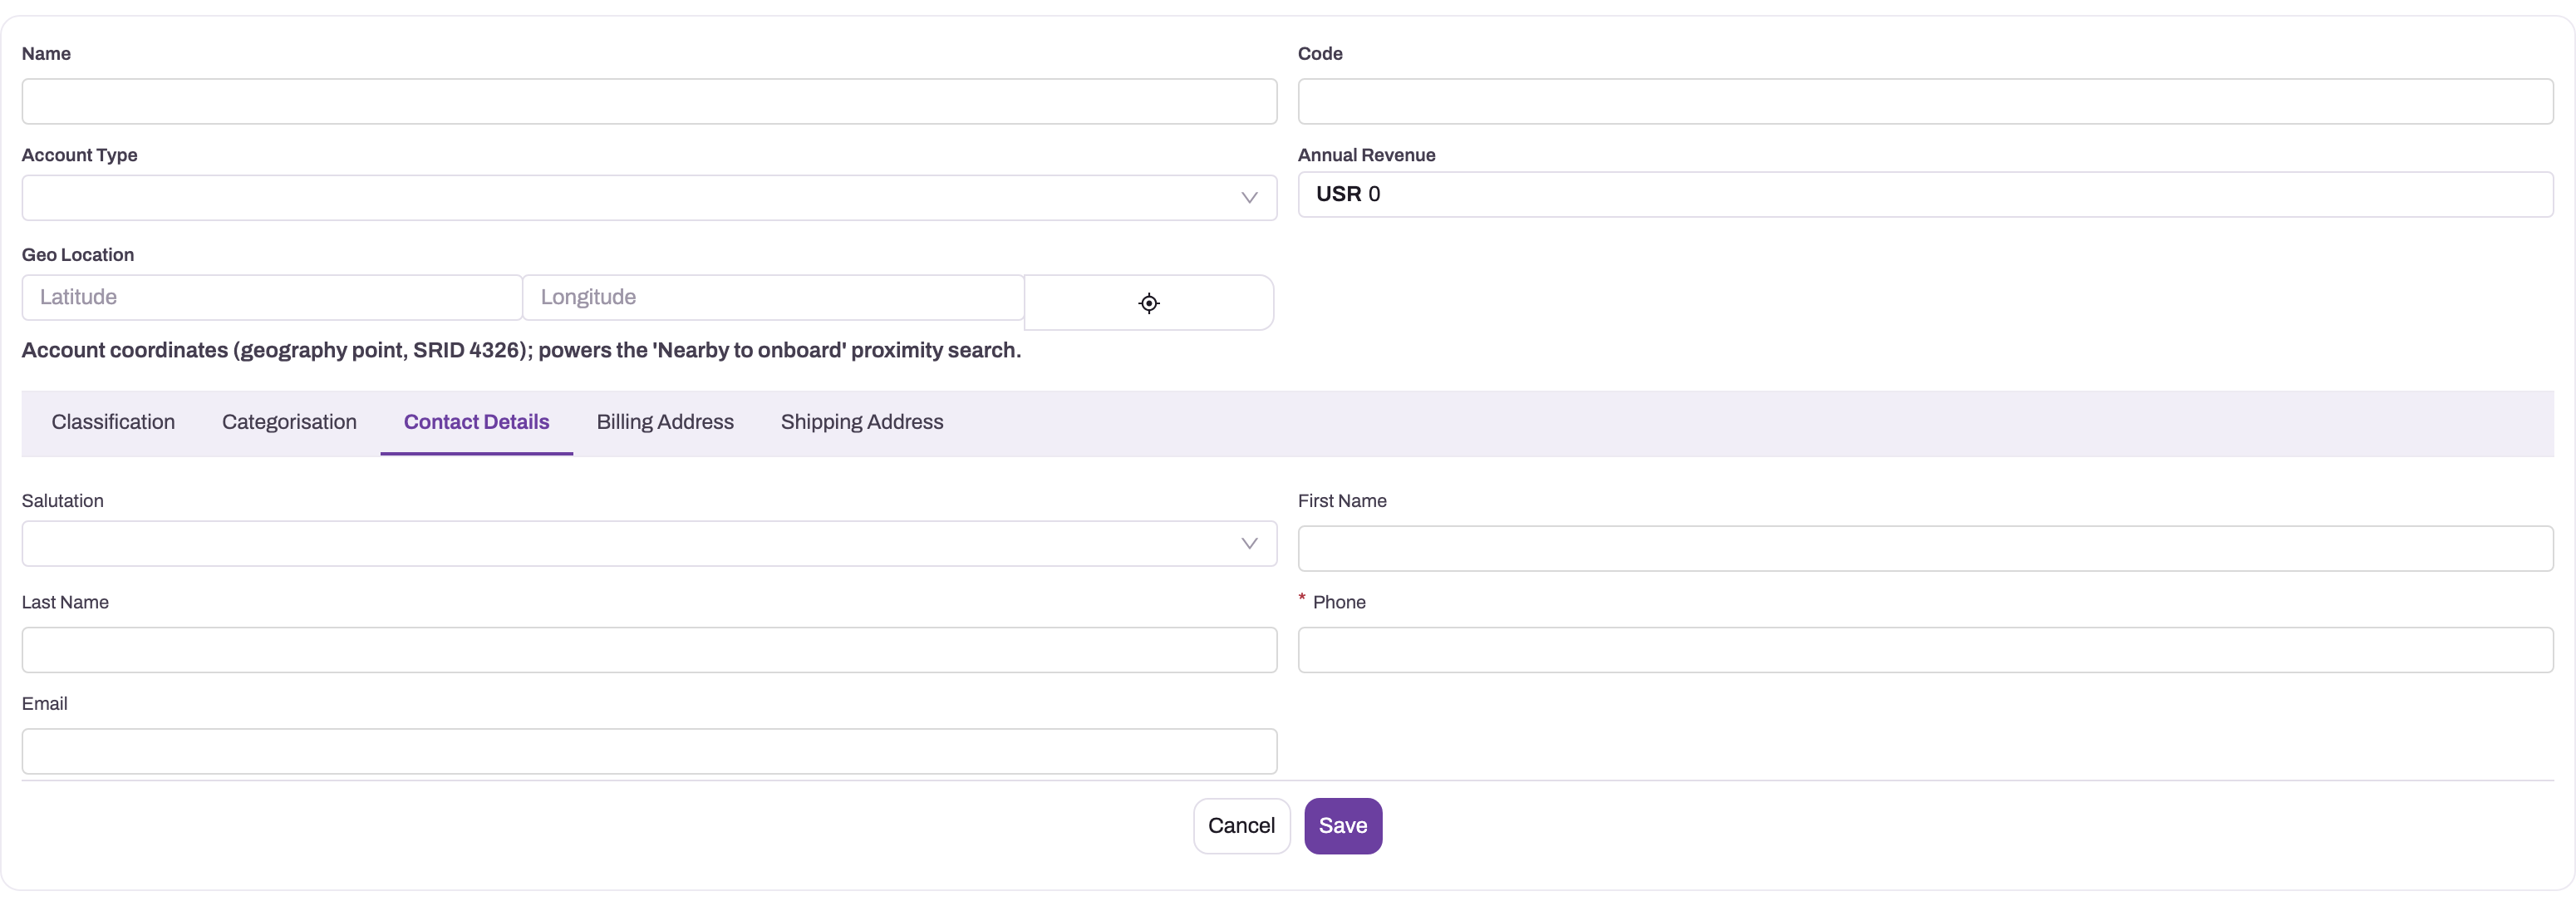
- 1
Contact Details is a separate tab in the new-record journey.
- 2
Salutation and personal name identify the initial business contact.
- 3
Phone and email should belong to the contact and be verified before save.
- 4
Save creates the Account and, when enabled, its first Contact as one governed flow.
The Contact Details tab captures salutation, first name, last name, phone and email for the initial contact created with the account. It is most useful when Create Account Contact is enabled. Use an address and number that belong to the business contact, check spelling before saving, and add further people later from the detail page's Contact & Address Info tab rather than overloading this first contact.
Step 5 — Confirm the billing address
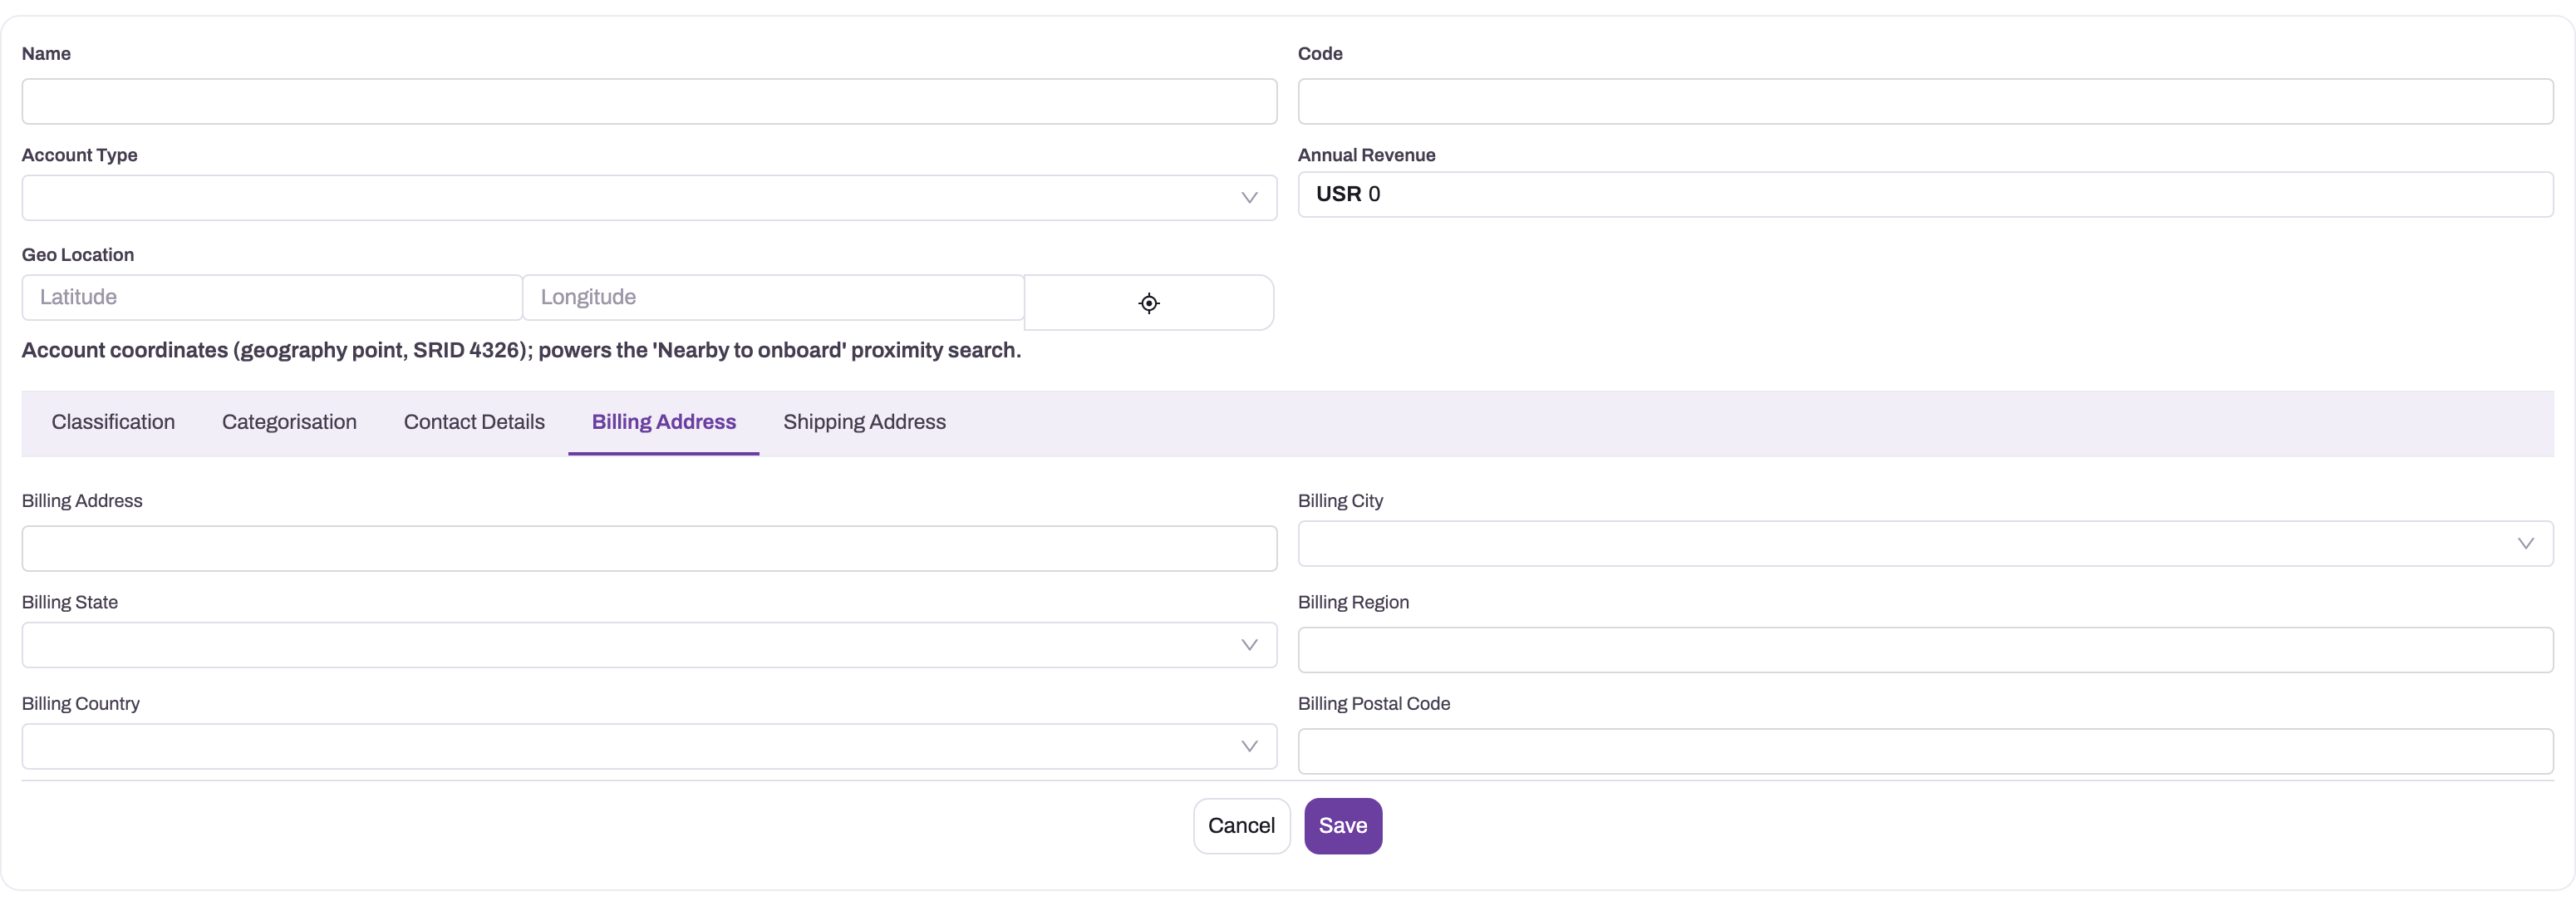
- 1
Billing Address is selected independently from the Shipping Address tab.
- 2
Address, city and state identify the registered billing destination.
- 3
Region, country and postal code should use consistent structured values.
- 4
Review the billing geography before saving because downstream tax can read it.
The Billing Address tab records the invoicing destination as structured address, city, state, region, country and postal-code fields. Select reference values where the form provides them instead of typing variations. Billing geography can affect tax determination, document output and integrations, so do not copy the shipping address automatically unless it is genuinely the registered billing location.
Step 6 — Confirm the shipping address
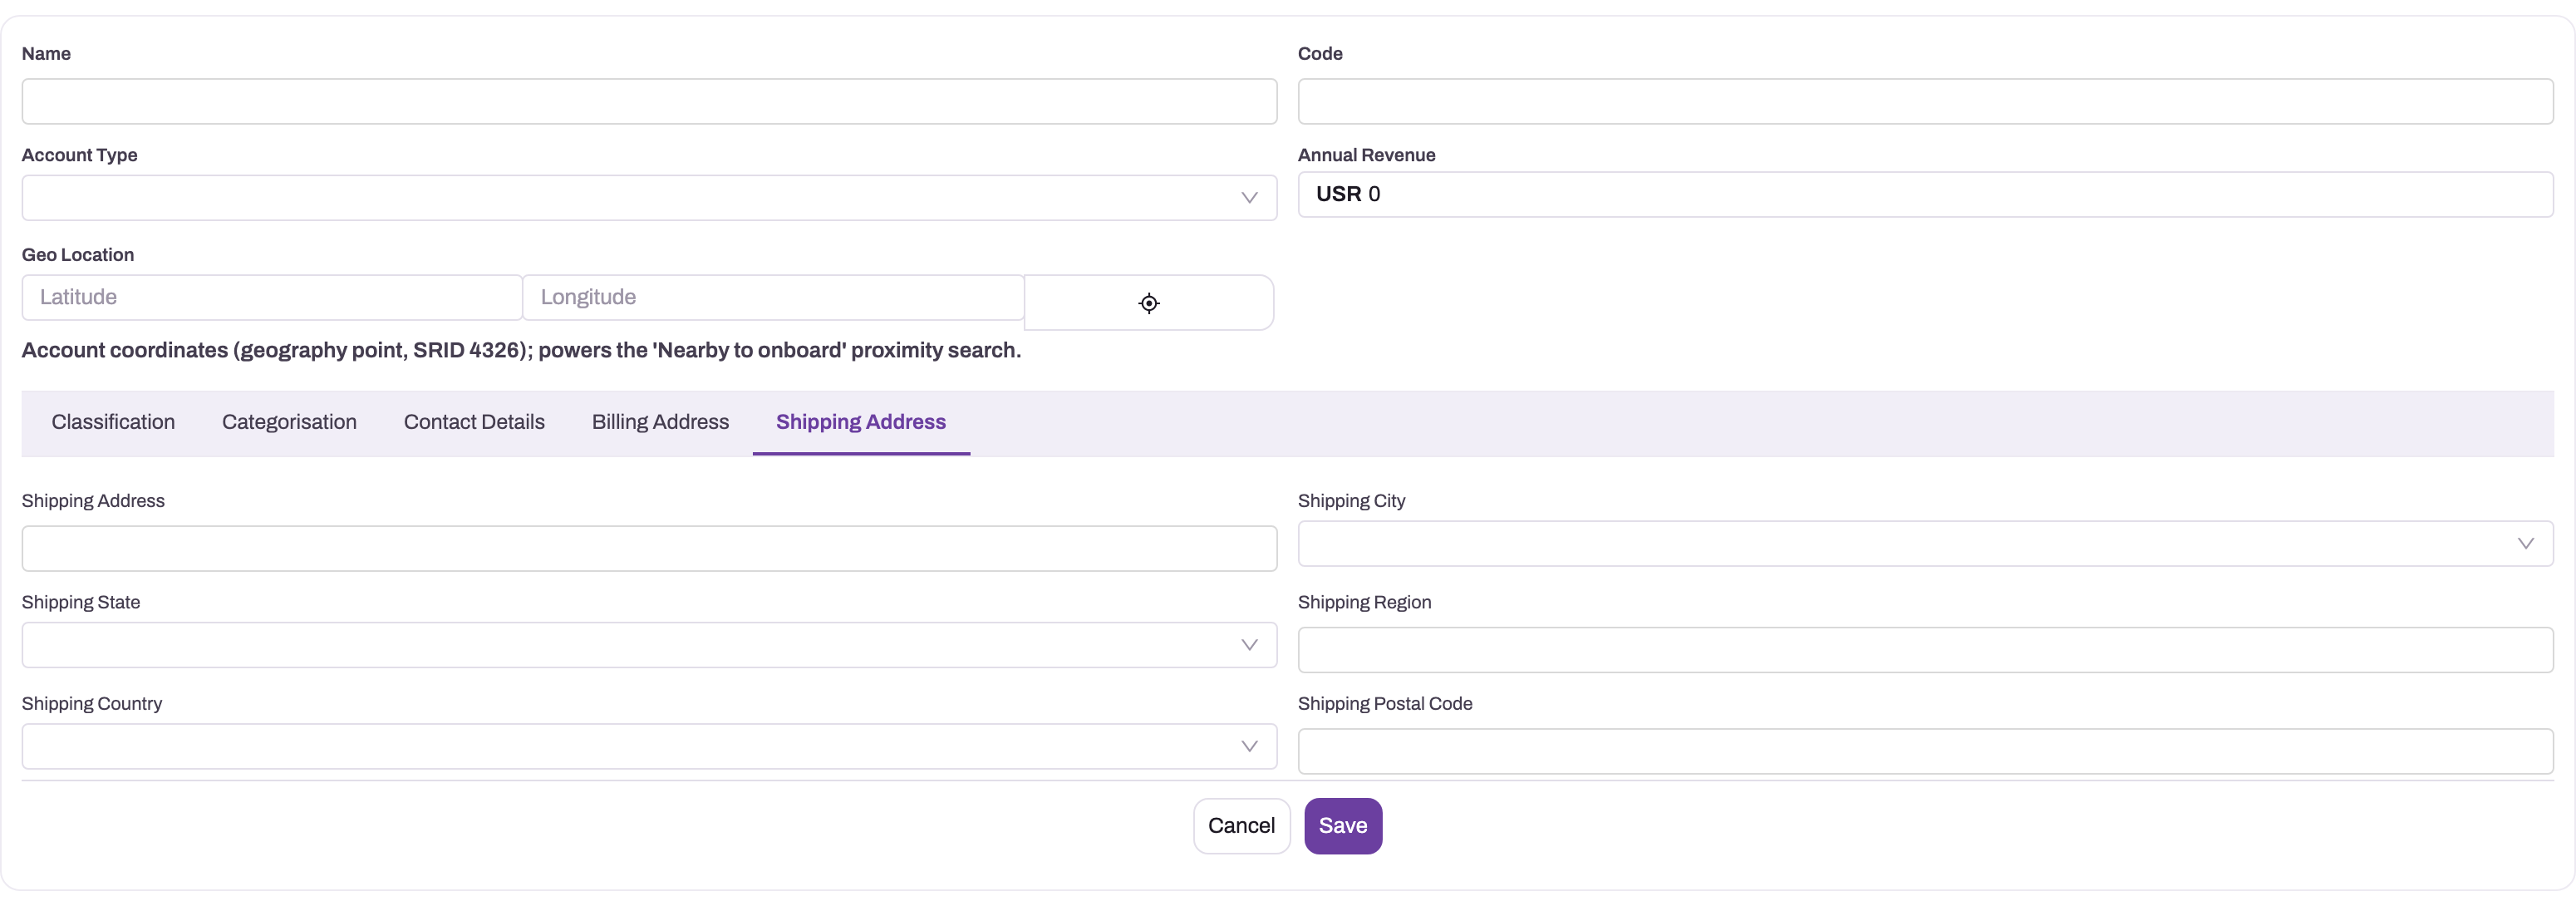
- 1
Shipping Address is the final creation tab in this Account layout.
- 2
Address, city and state describe the receiving location.
- 3
Region, country and postal code support fulfilment and logistics.
- 4
Save only after billing and shipping have each been verified for their distinct purpose.
The Shipping Address tab holds the default fulfilment destination. It mirrors the billing structure but serves a different purpose: delivery planning, fulfilment documents and logistics integrations can read these values. Enter the operational receiving location, including the correct state, region, country and postal code. Additional delivery sites can be added after saving without replacing the account's billing identity.
Step 7 — Review the Sales tab on the detail page
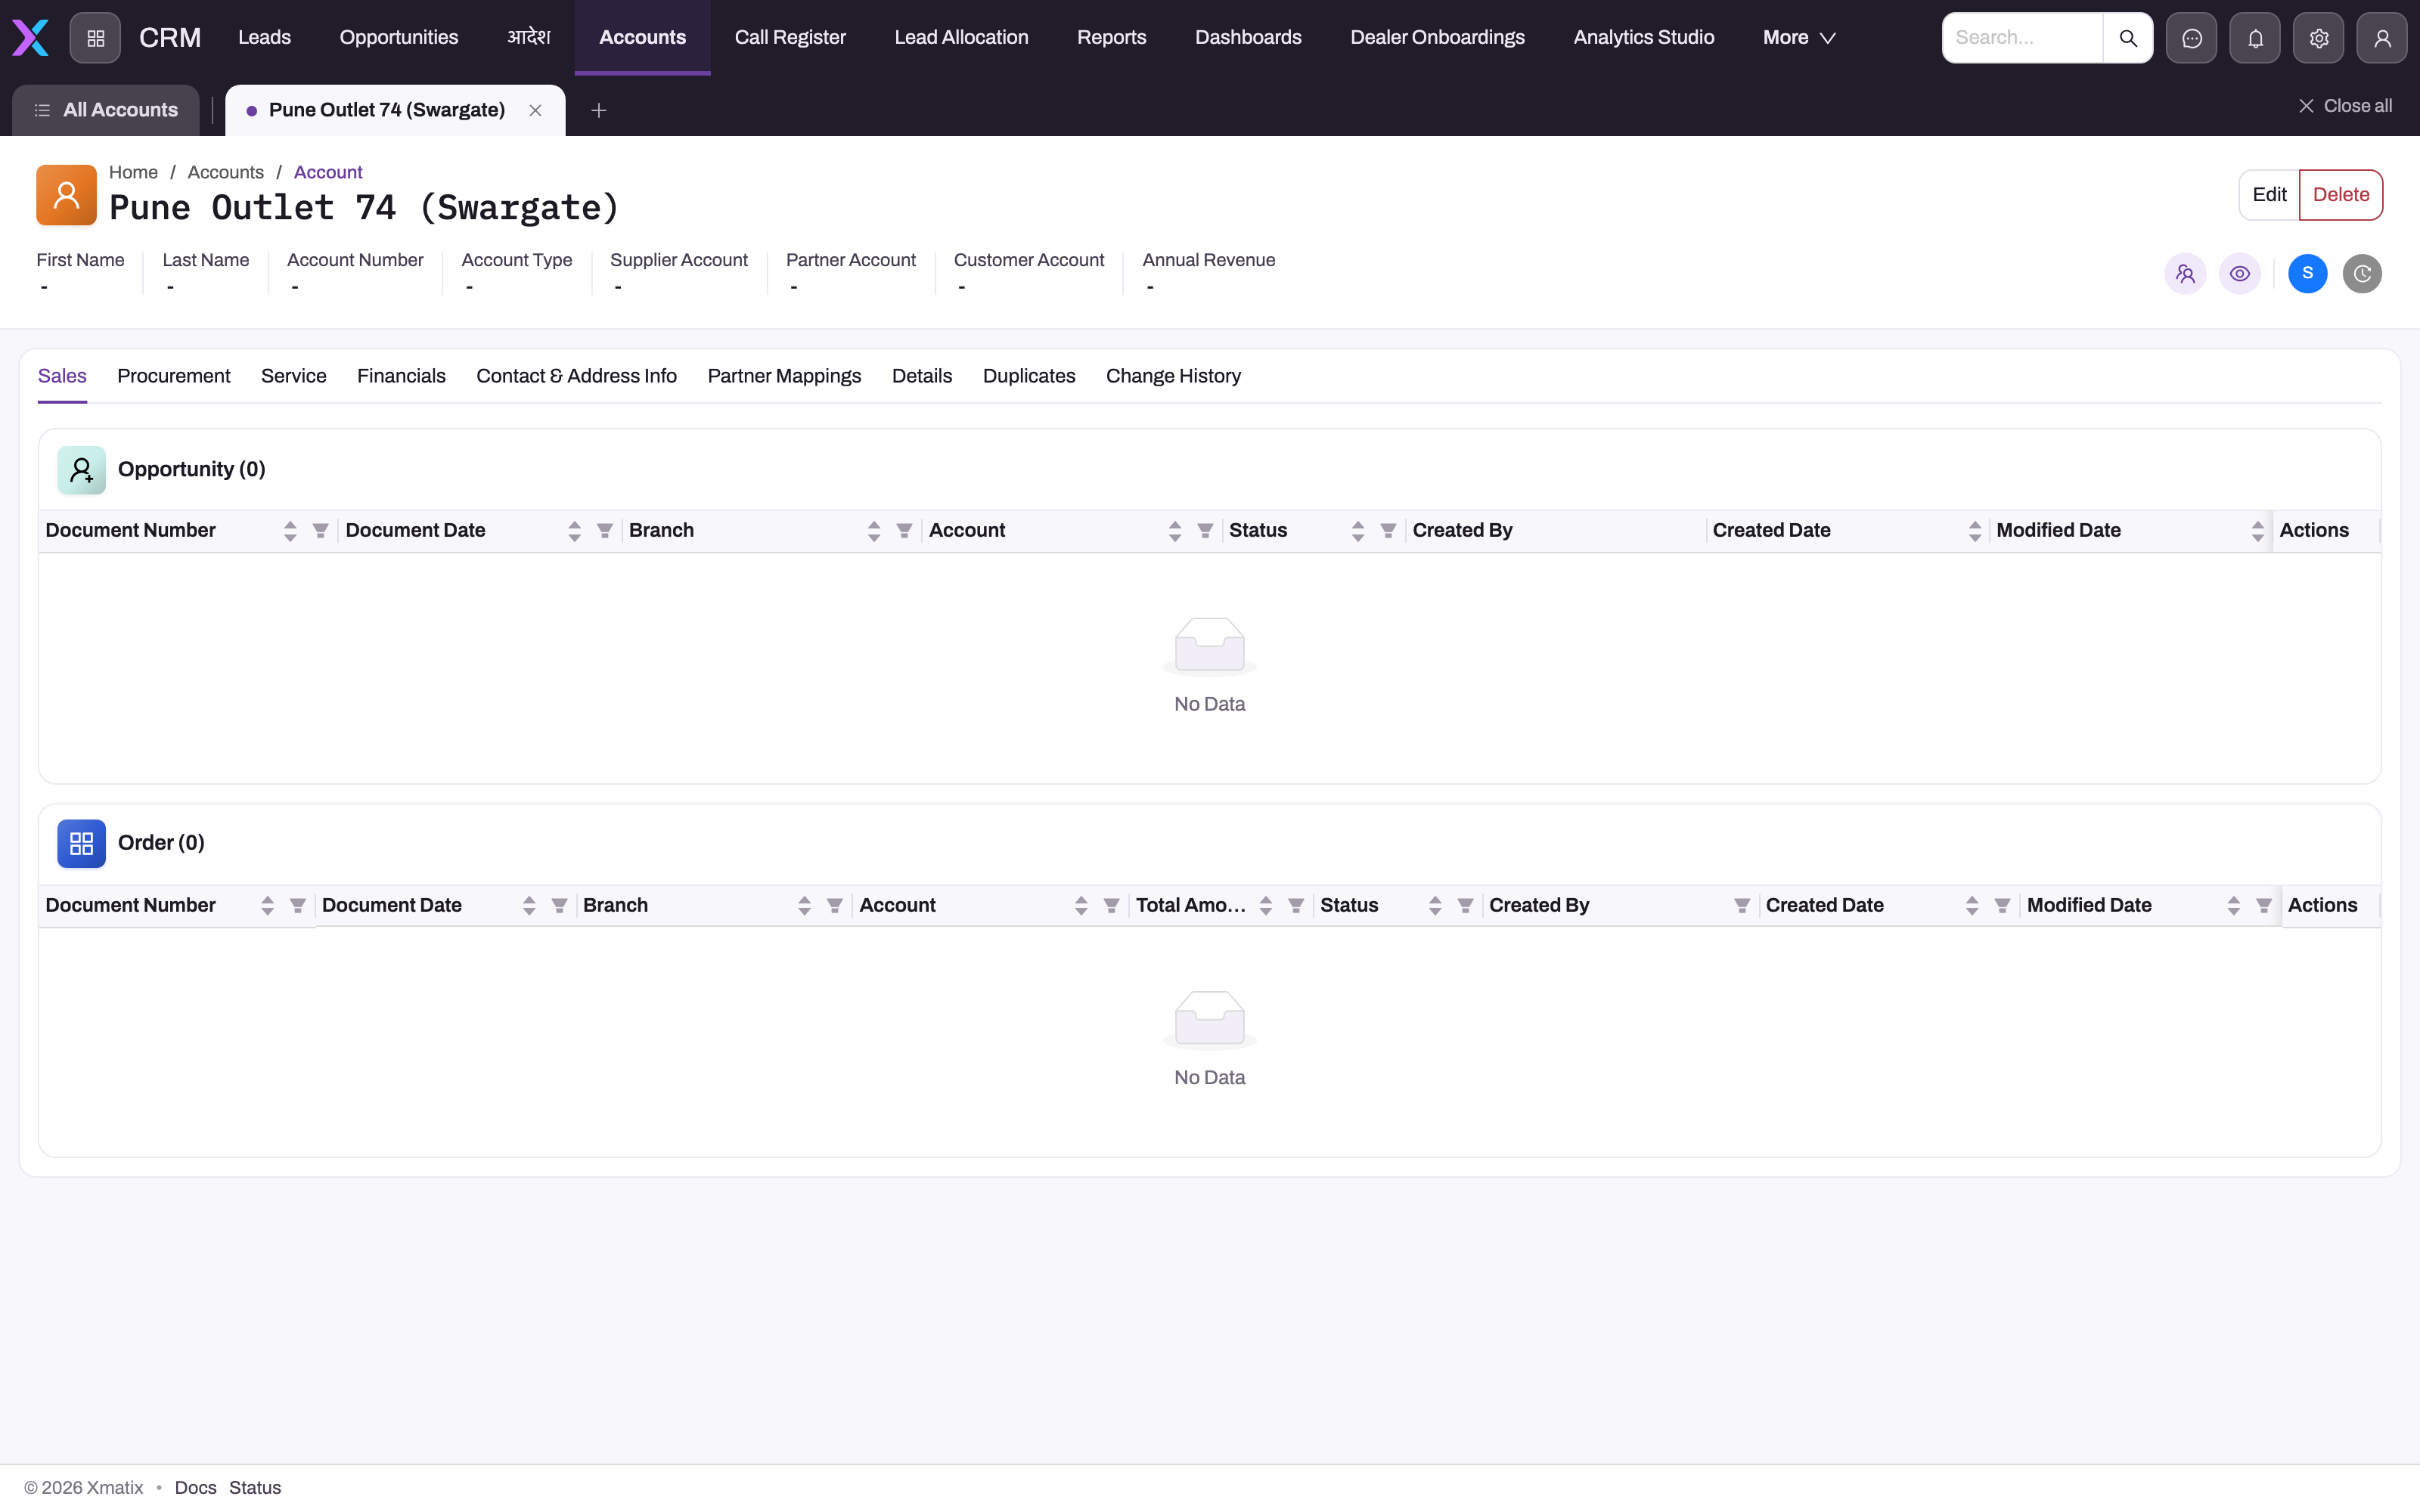
- 1
The record heading confirms which Account owns every related list on this page.
- 2
Sales is selected among the record's process and audit tabs.
- 3
Opportunity count and columns summarize early-stage commercial work.
- 4
Order count and list show downstream sales documents; No Data is a valid zero-record state.
After saving or opening an account, the Sales tab gathers sales-side records related to that account, including opportunities and orders. Counts show whether related records exist; each embedded list retains its own columns and actions. Use this tab to understand the commercial history in context, then open a linked document for its complete lifecycle rather than attempting to manage the whole document inside the account page.
Step 8 — Review Procurement relationships
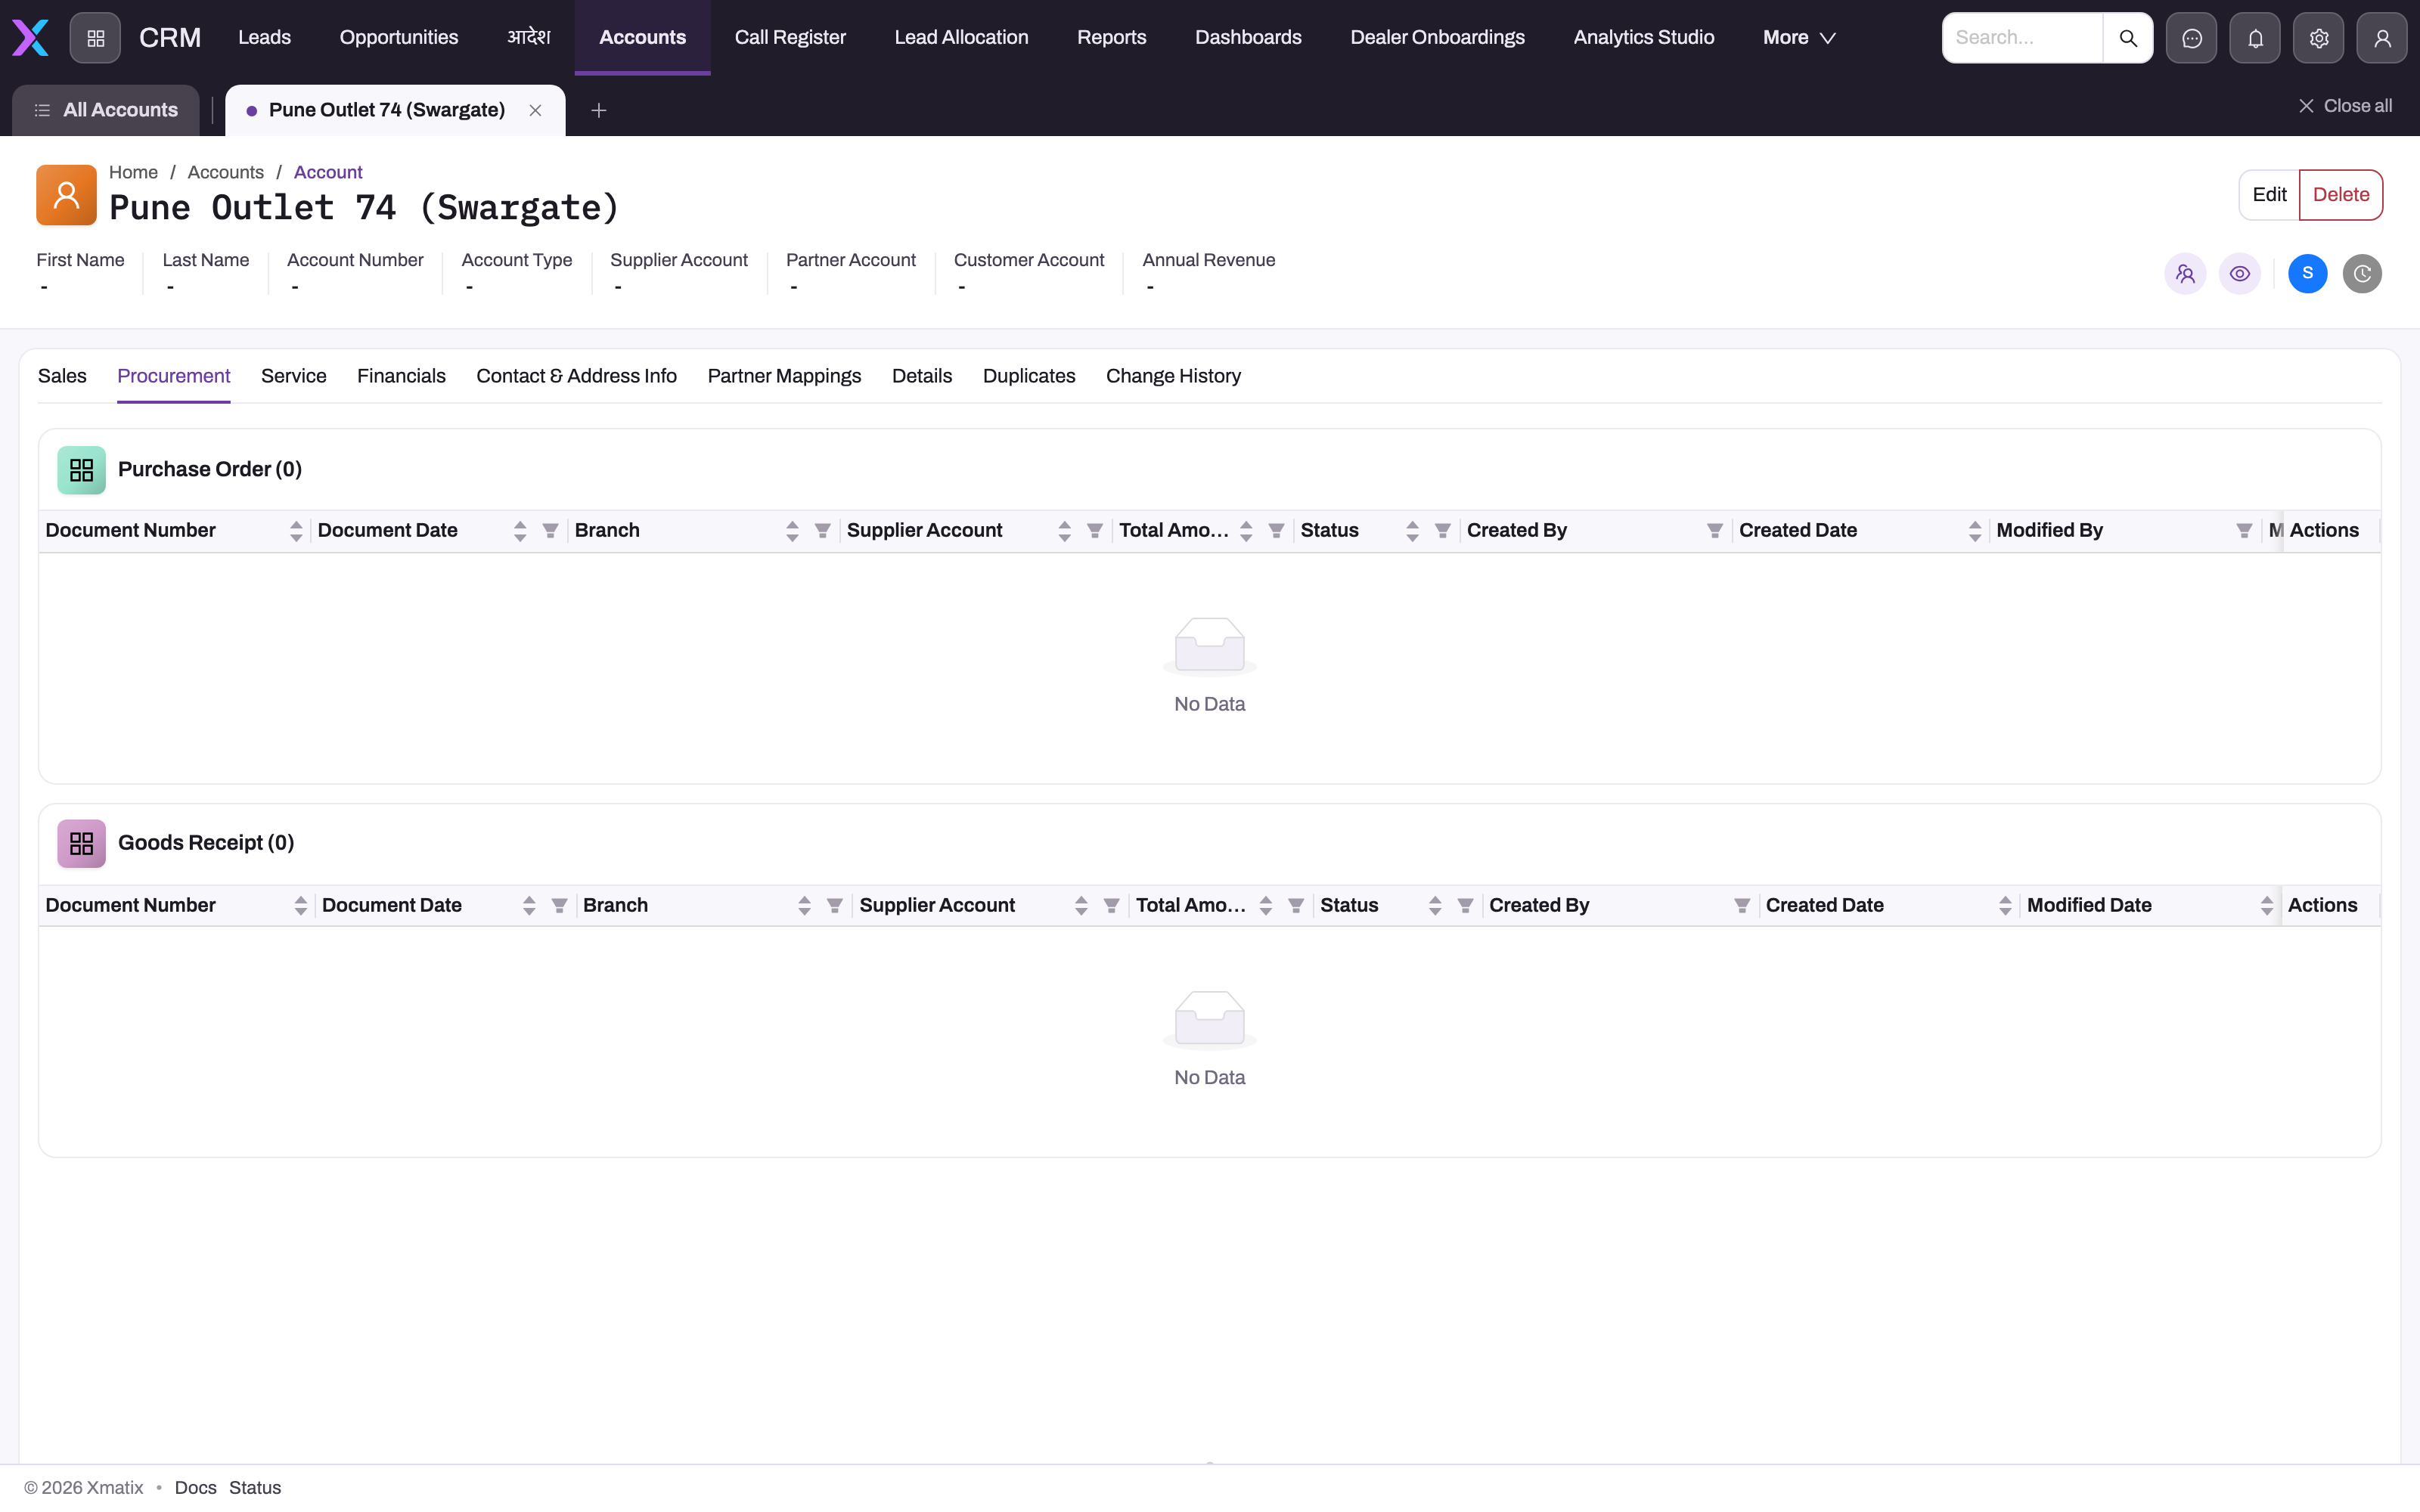
- 1
The open Account remains visible while moving between process tabs.
- 2
Procurement is the selected relationship workspace.
- 3
Purchase Orders show commitments raised against this supplier account.
- 4
Goods Receipts complete the source-to-receipt view; zero records are reported explicitly.
The Procurement tab is relevant when the account is also a supplier. It groups purchase orders and goods receipts, making the source-to-receipt trail visible from the party master. Empty panels are meaningful: they indicate that no matching procurement record is currently related to this account, not that the page failed to load.
Step 9 — Review Service activity
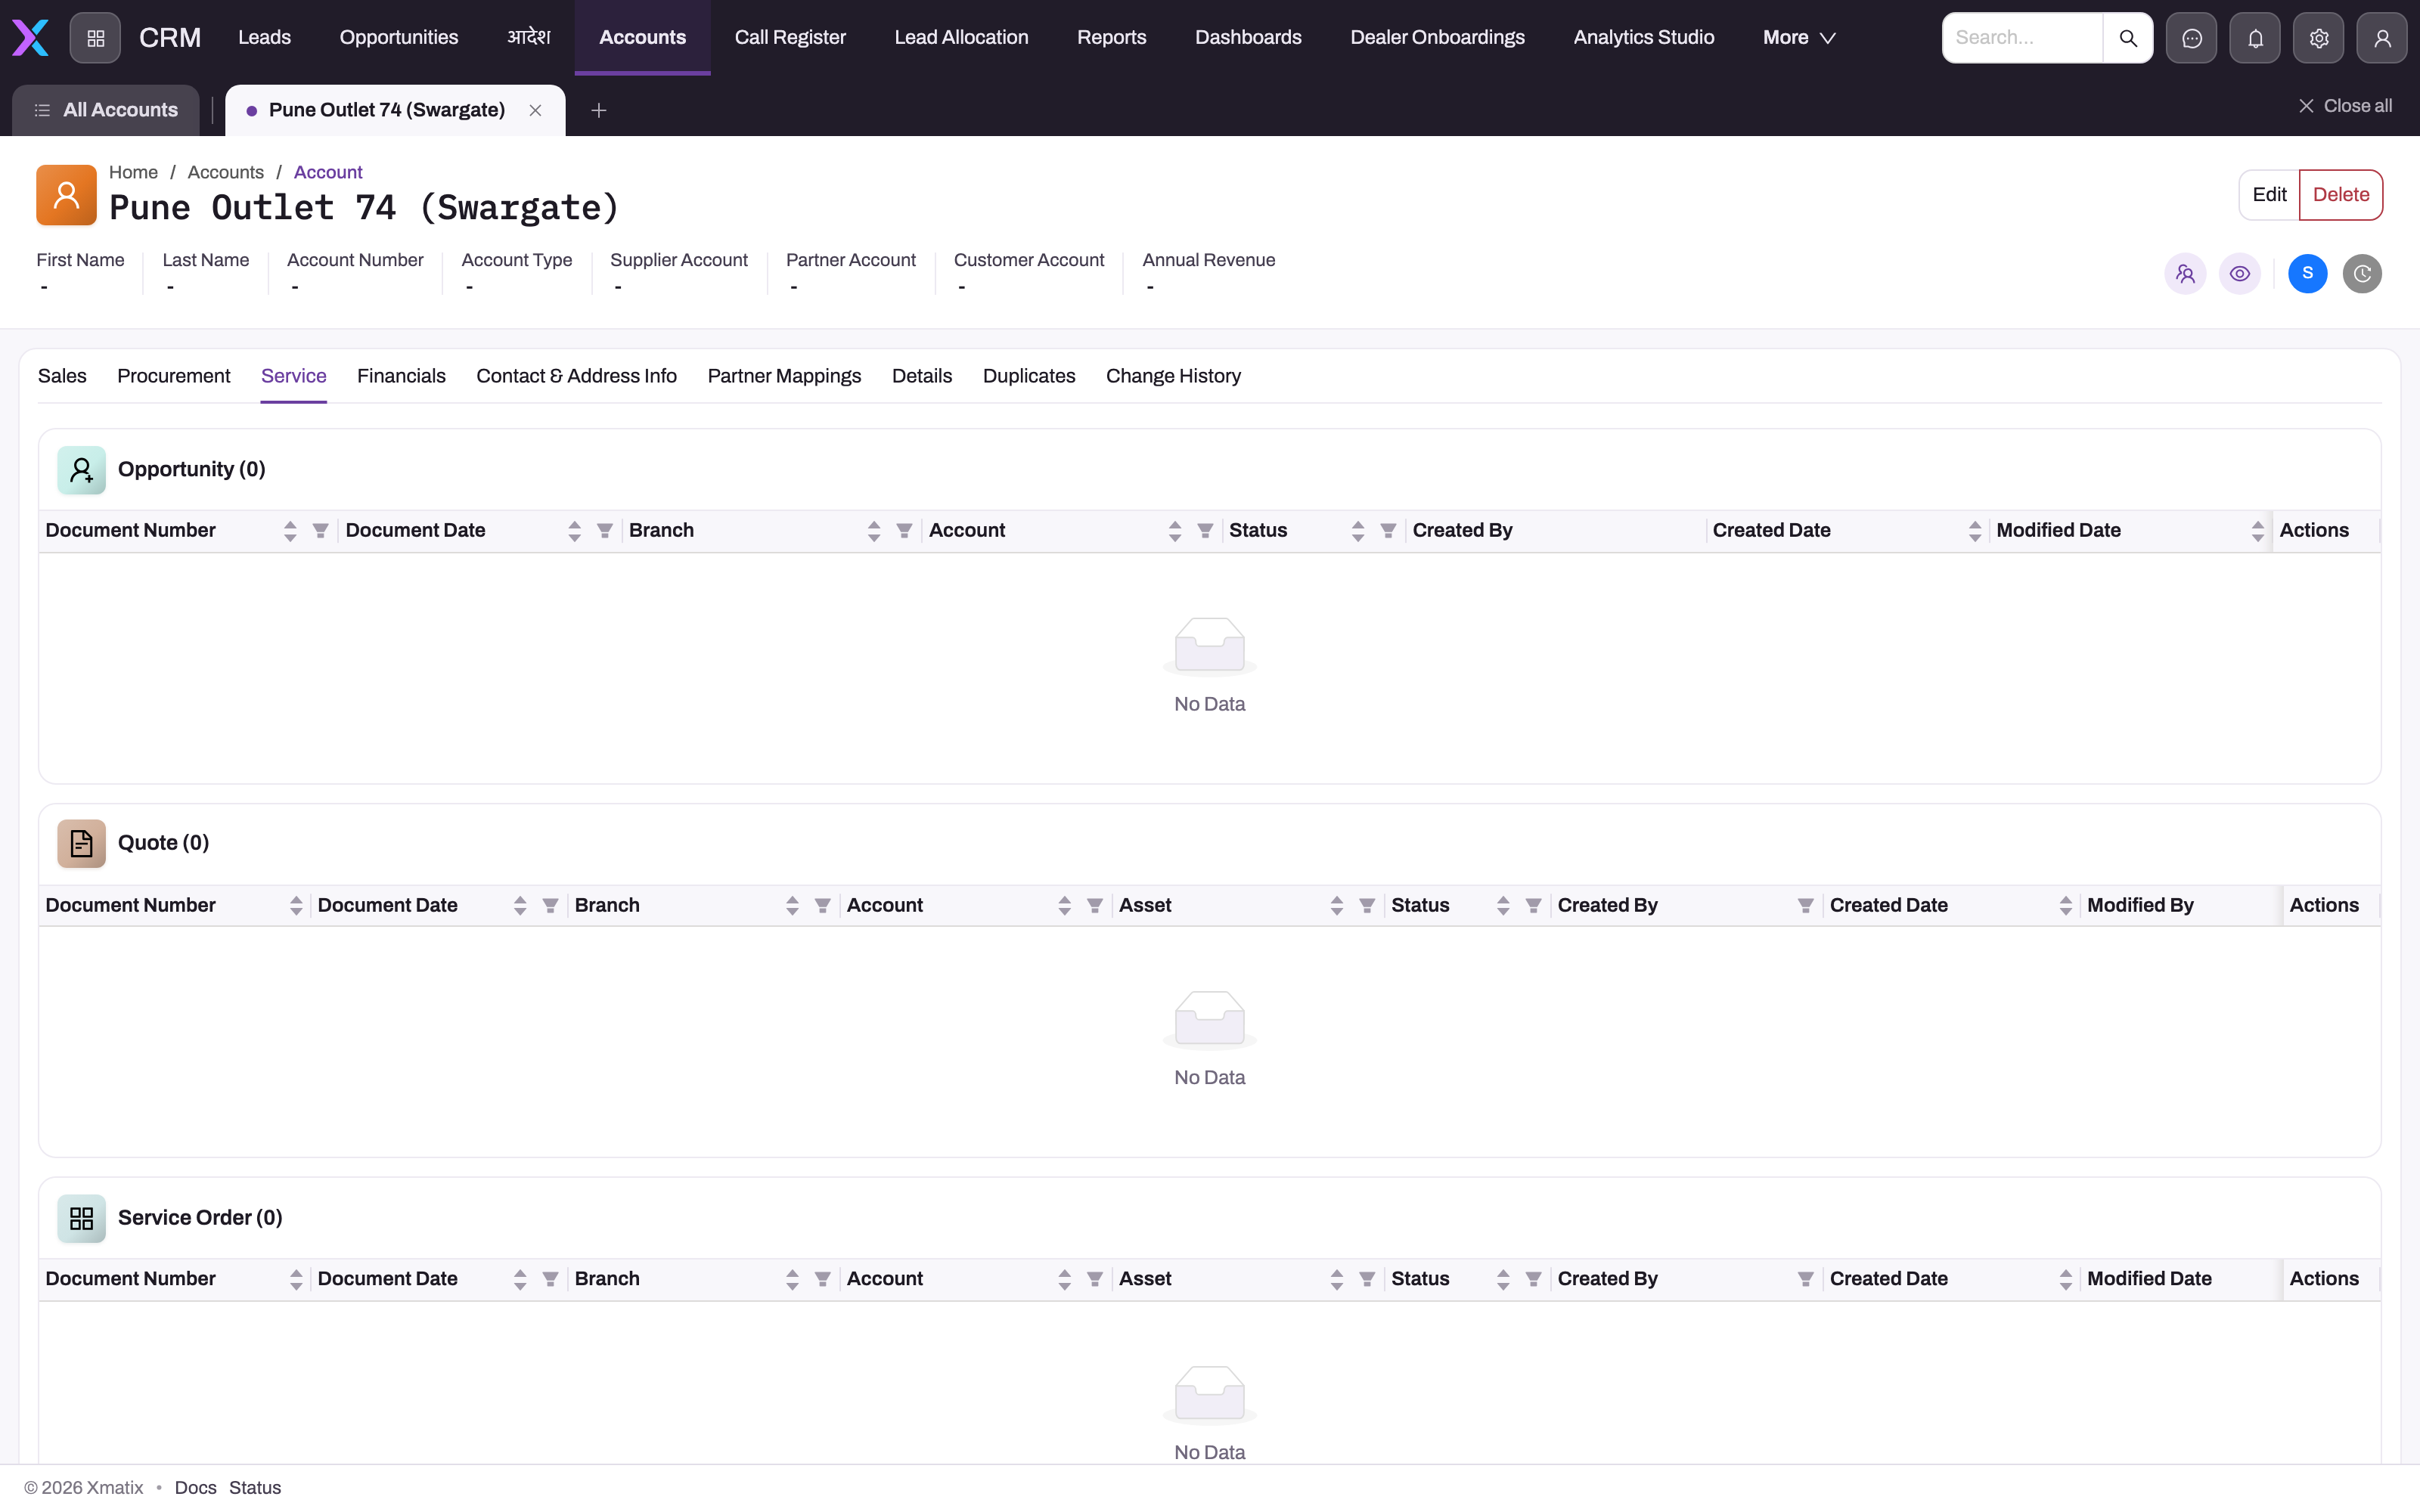
- 1
Service selects the account's service-side relationship workspace.
- 2
Opportunities represent service demand before a formal quote or order.
- 3
Quotes expose proposed service work and its current status.
- 4
Service Orders hold executable work; open a linked row for scheduling and fulfilment detail.
The Service tab brings together service opportunities, quotes, service orders and other enabled service records. Use the separate counts to distinguish an account with no service demand from one whose work is already in progress. Open the relevant linked document for scheduling, entitlement, parts, labour or invoicing details.
Step 10 — Review Financials
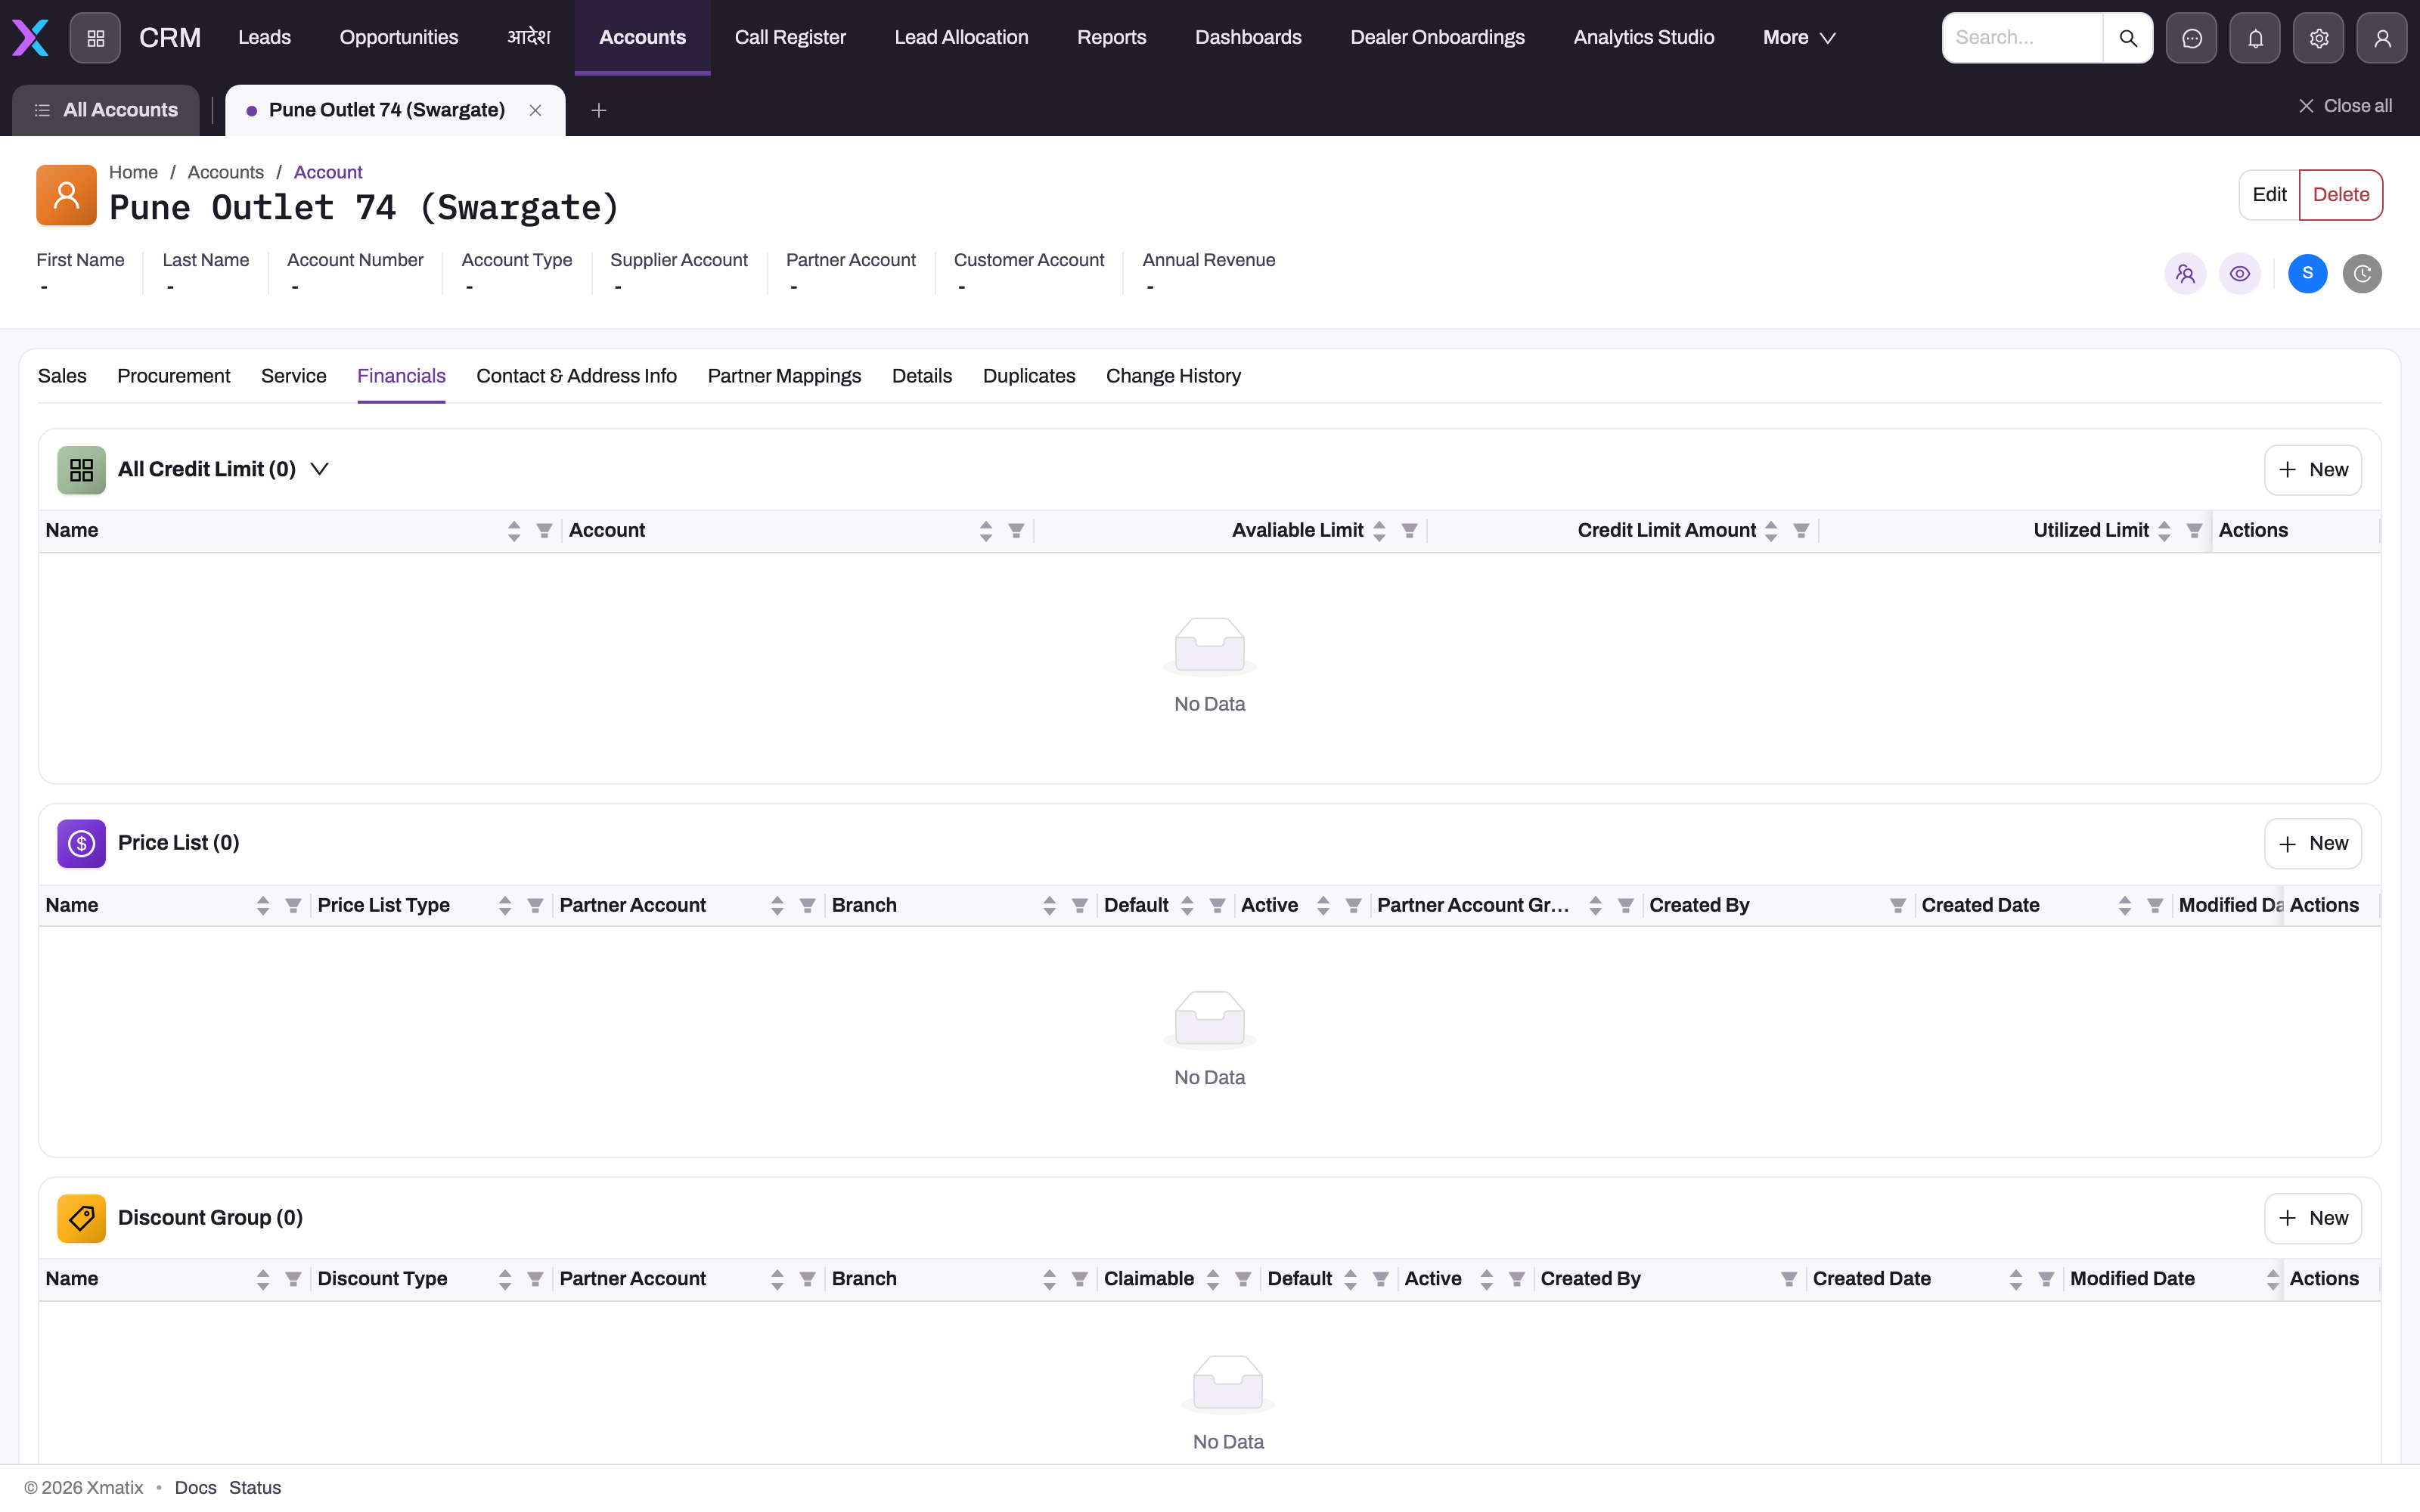
- 1
Financials is selected from the Account detail tabs.
- 2
Credit Limit rows govern permitted exposure rather than merely reporting balances.
- 3
Price Lists determine eligible transaction prices by scope and effective configuration.
- 4
Discount Groups govern contract discounts; New is specific to each embedded panel.
The Financials tab exposes commercial controls attached to the account, such as credit limits, price lists and discount groups. These records govern what the customer can buy and how transactions price; they are not merely historical output. Verify company, branch, effective status and default indicators before creating a new control, because overlapping active configuration can change transaction results.
Step 11 — Maintain contacts and addresses
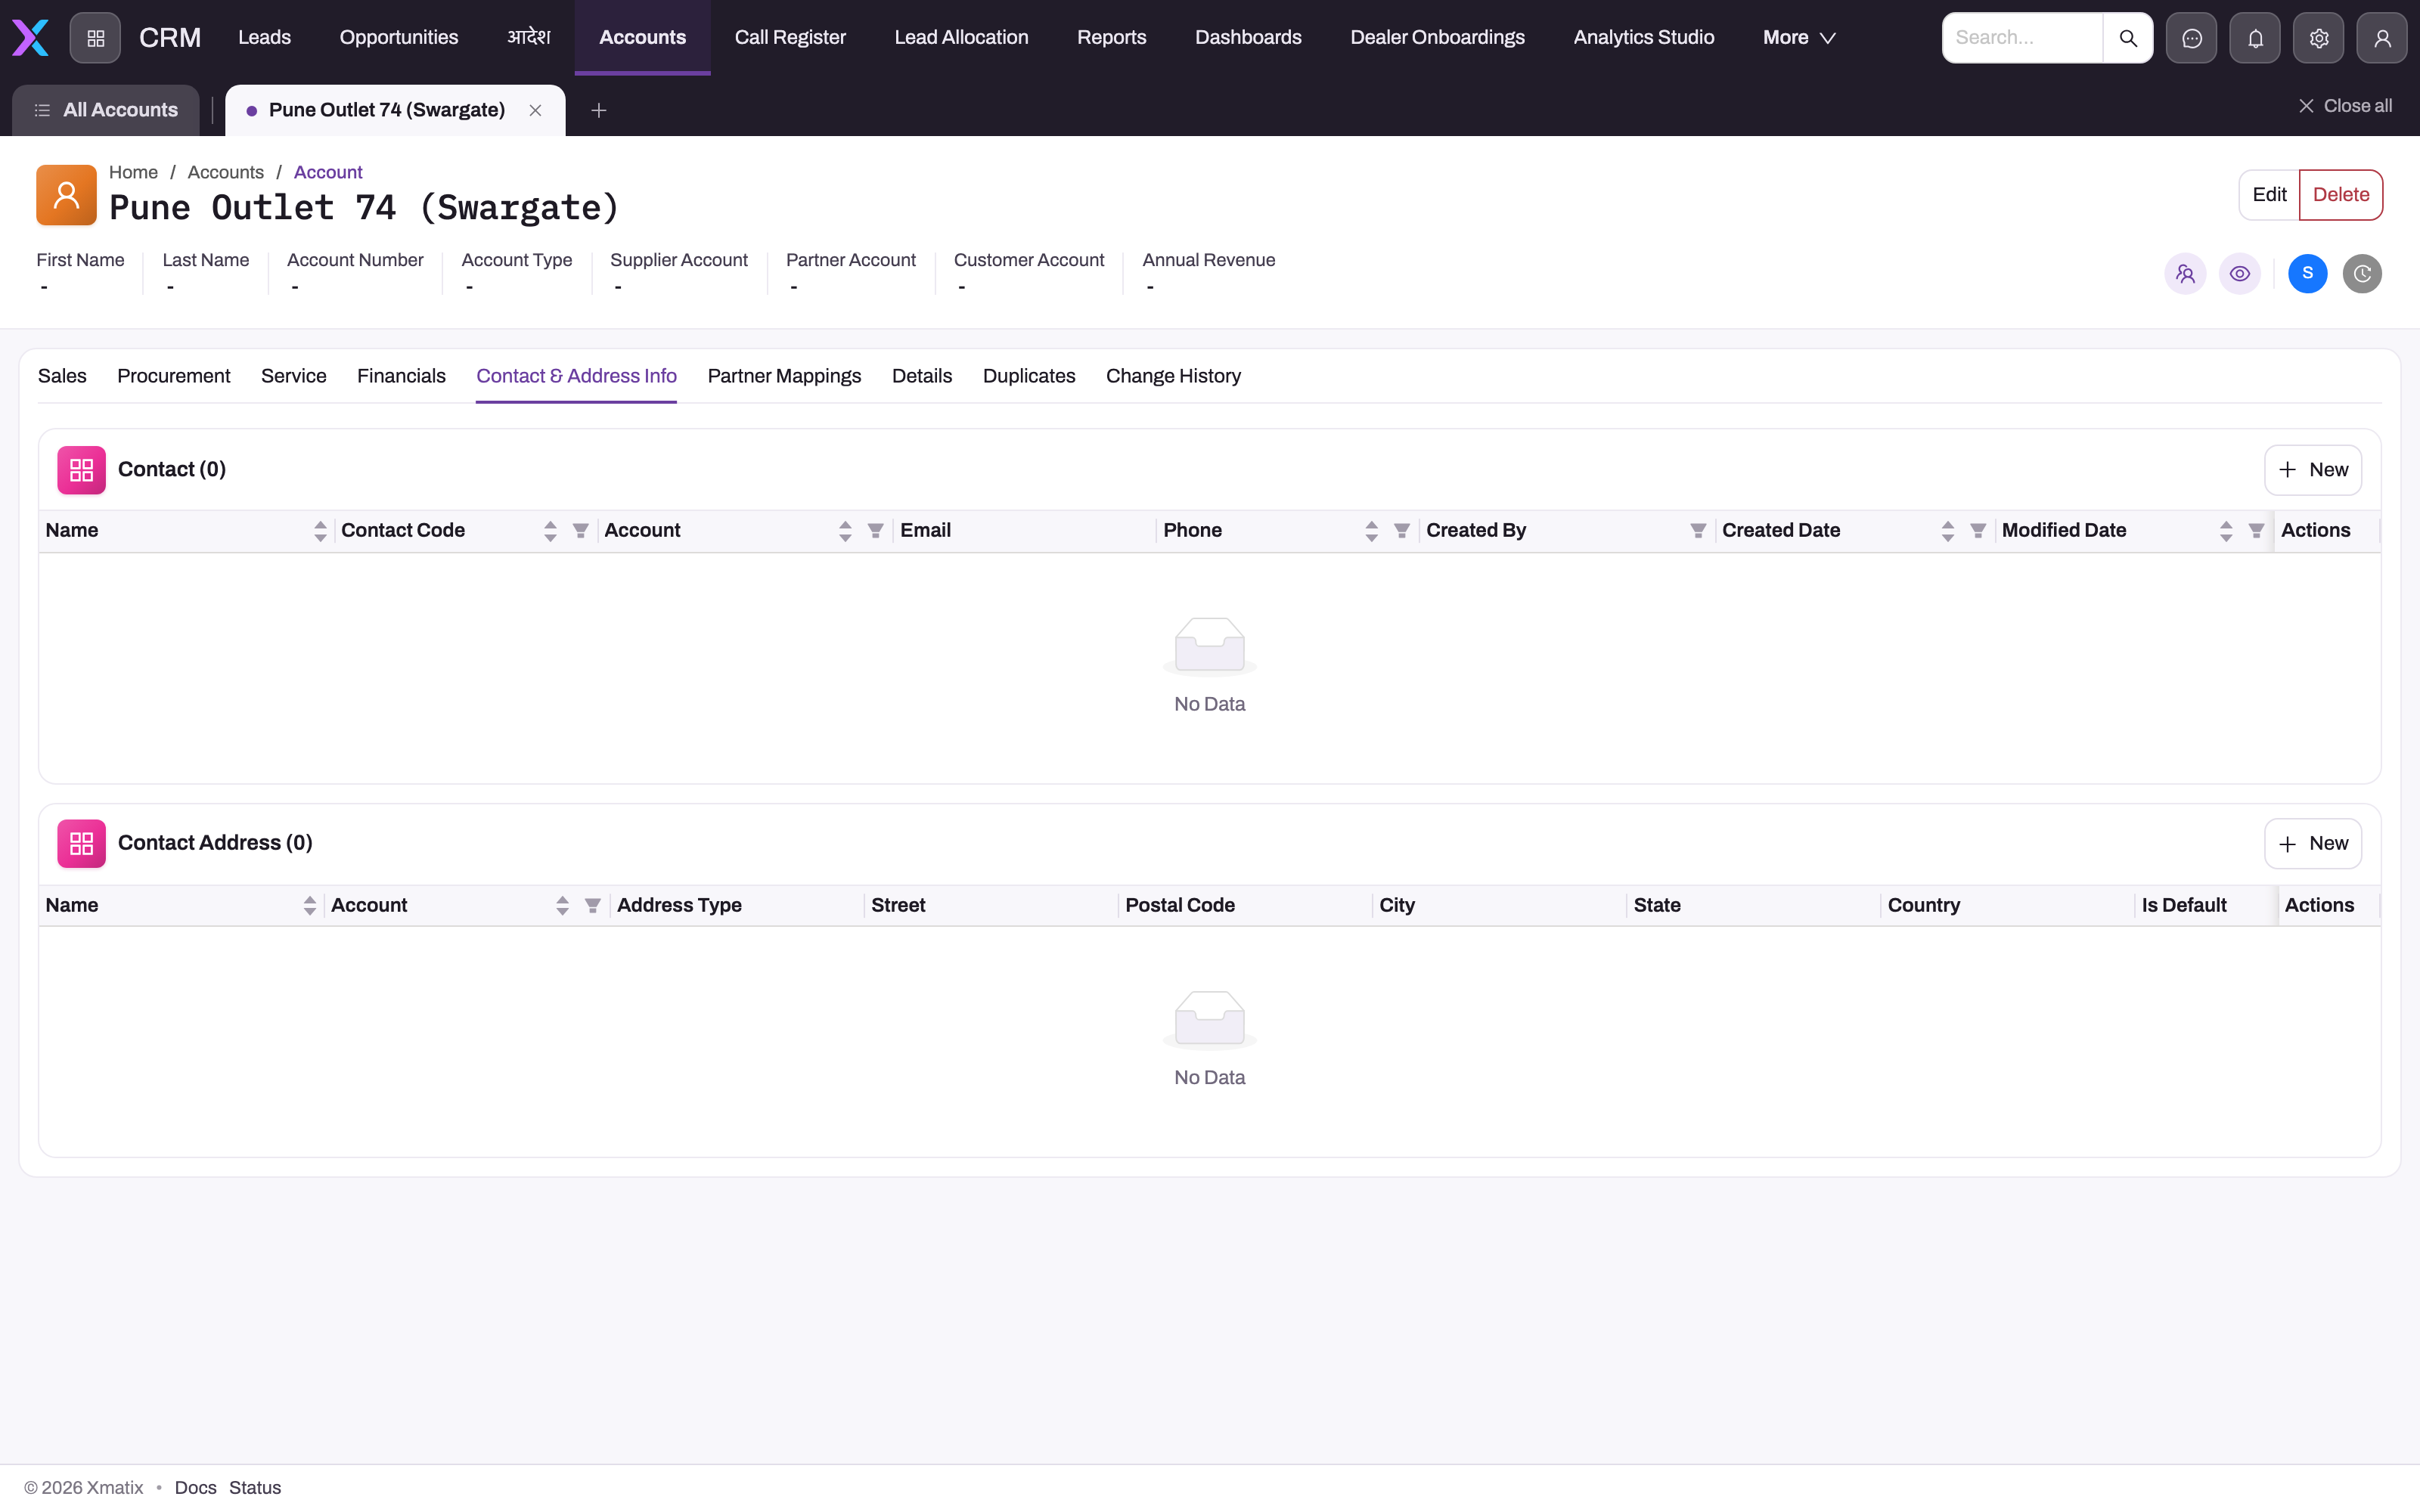
- 1
Contact & Address Info is the selected relationship tab.
- 2
Contacts store named people with email and phone details.
- 3
Contact Addresses store typed, structured locations and default indicators.
- 4
Each panel has its own New action so the correct related entity is created.
The Contact & Address Info tab separates named contacts from structured contact addresses. Use New in the appropriate panel, keep each person and location as its own record, and mark defaults deliberately. This preserves clean selection in orders, invoices, service work and integrations while retaining more than one contact or destination for the same account.
Step 12 — Review partner mappings
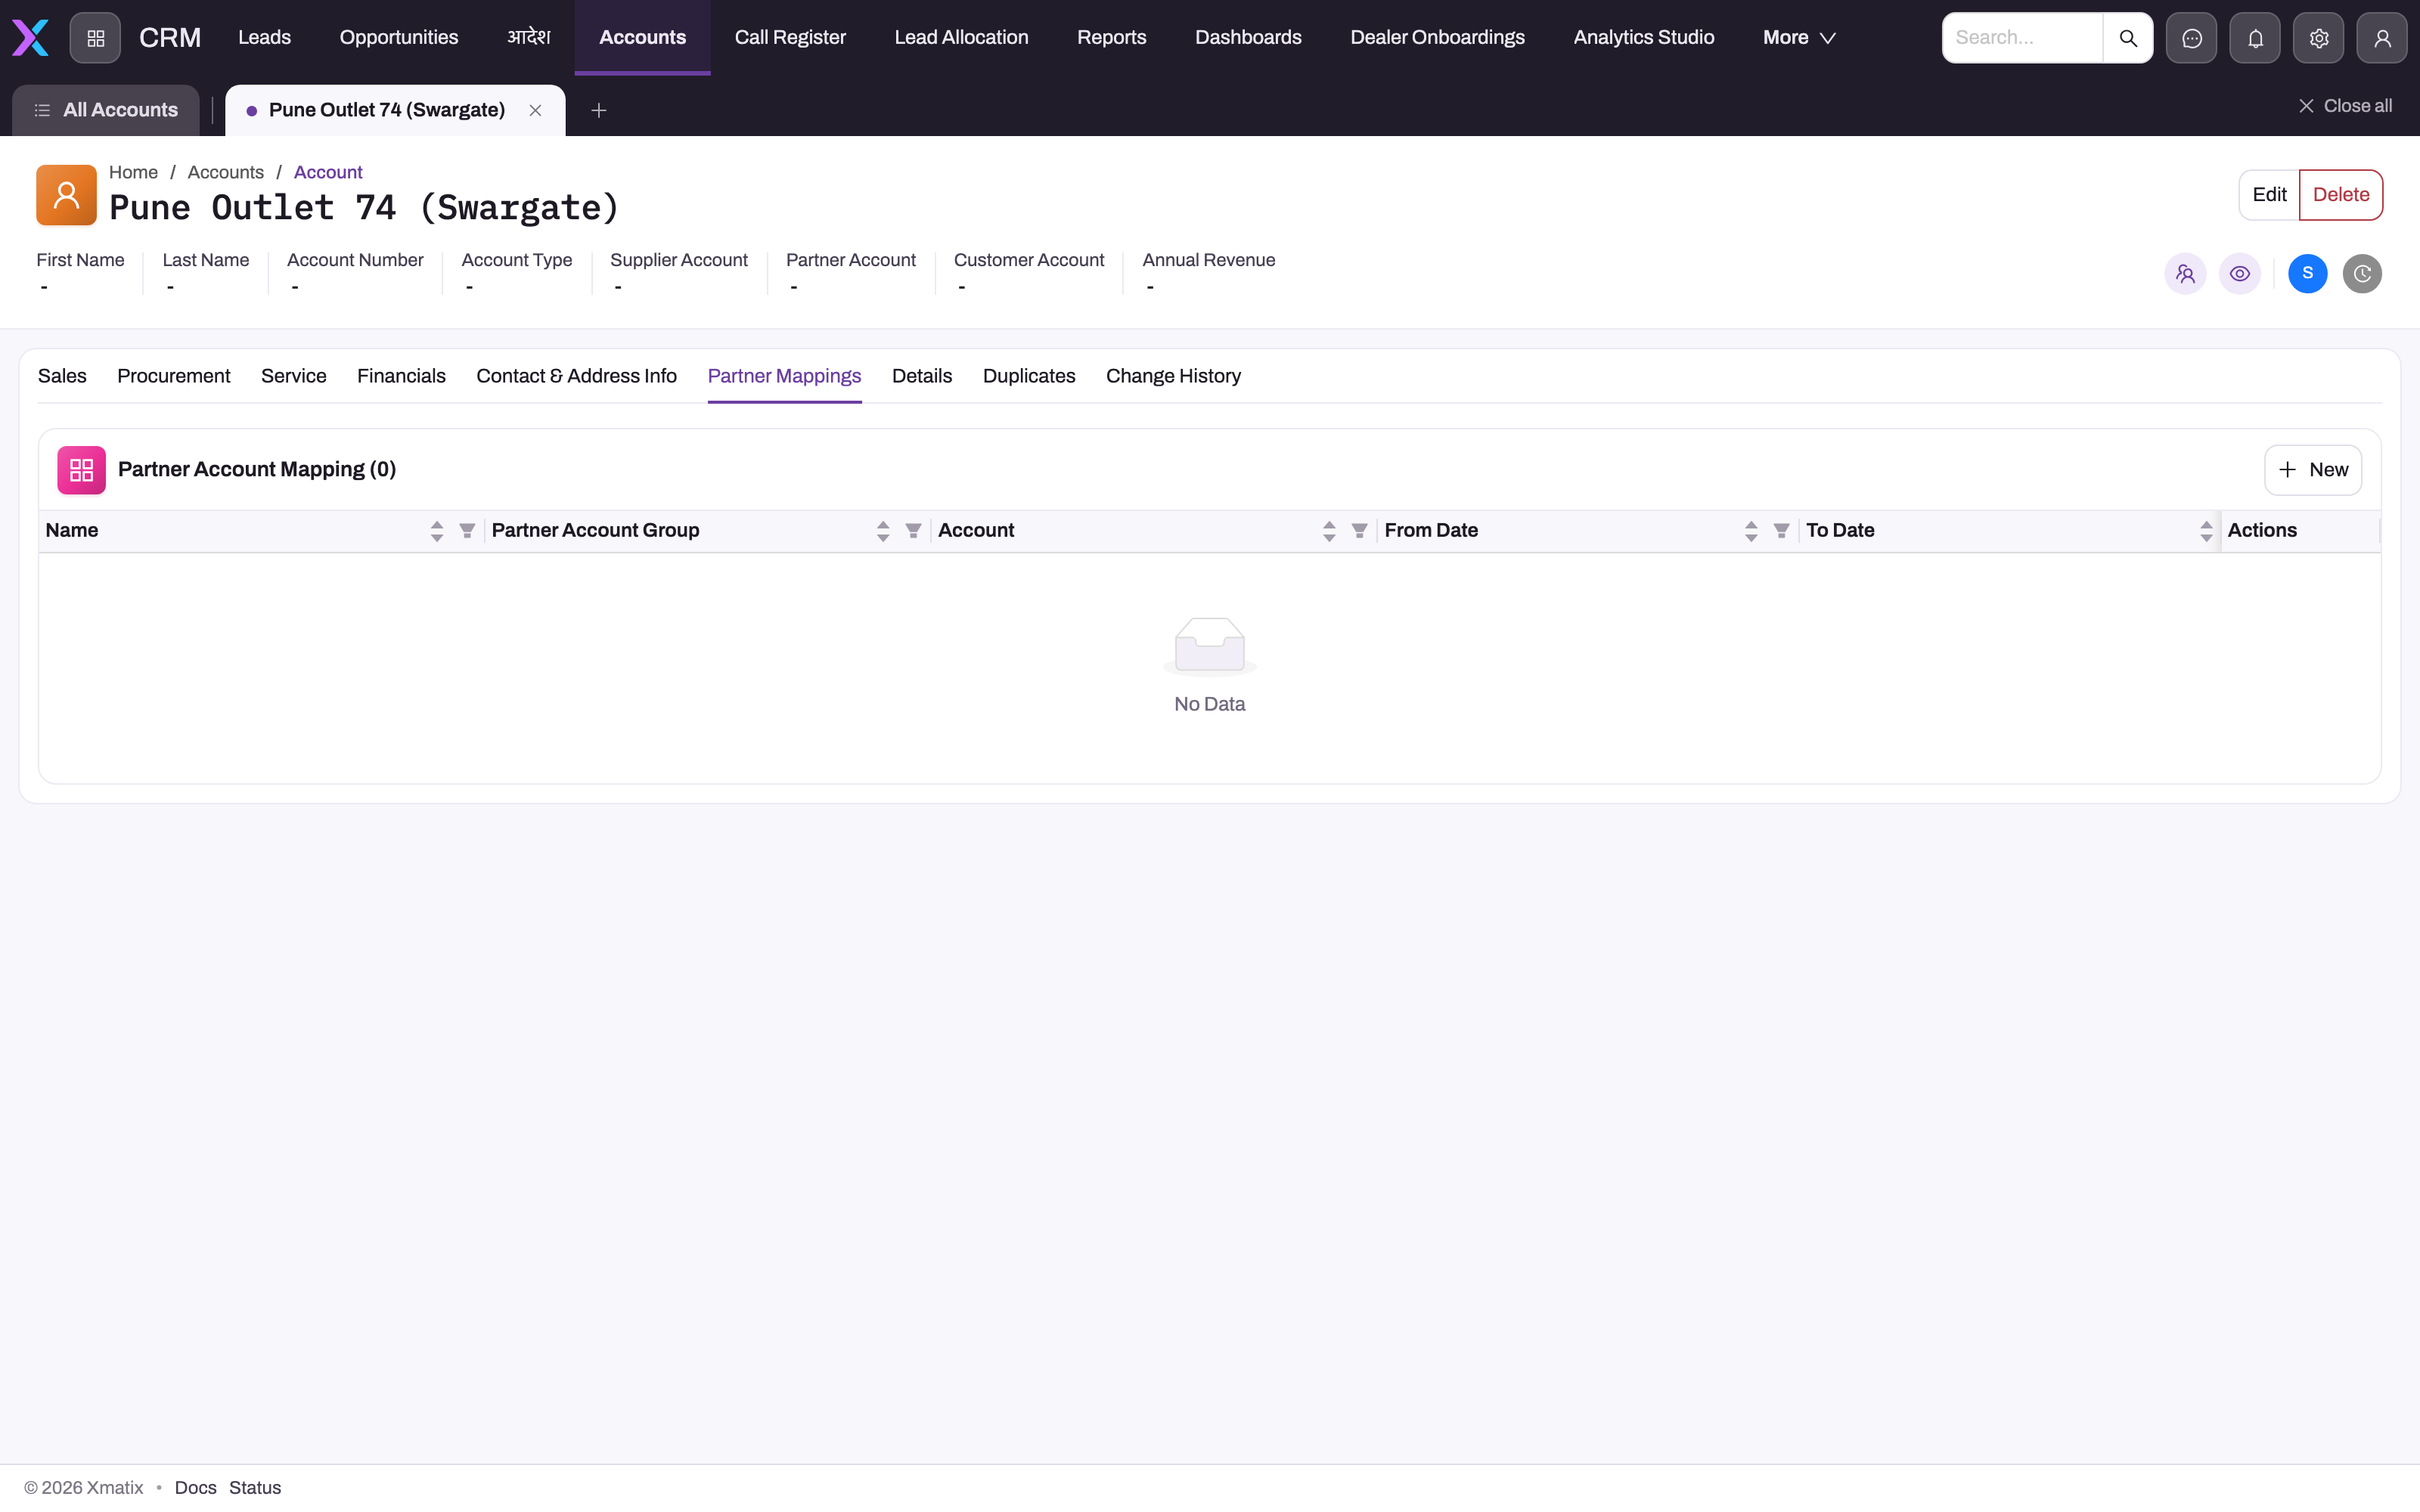
- 1
Partner Mappings selects the effective-dated association workspace.
- 2
The mapping records partner group, Account and the from/to date window.
- 3
New adds a period-aware mapping without erasing historical rows.
The Partner Mappings tab connects the account to partner account groups across an effective date window. These mappings can scope pricing, schemes, integrations or partner-specific behavior. Check both dates and the target group; an expired mapping should remain as history, while a genuinely new period should normally be represented by a new effective row.
Step 13 — Read the consolidated Details tab
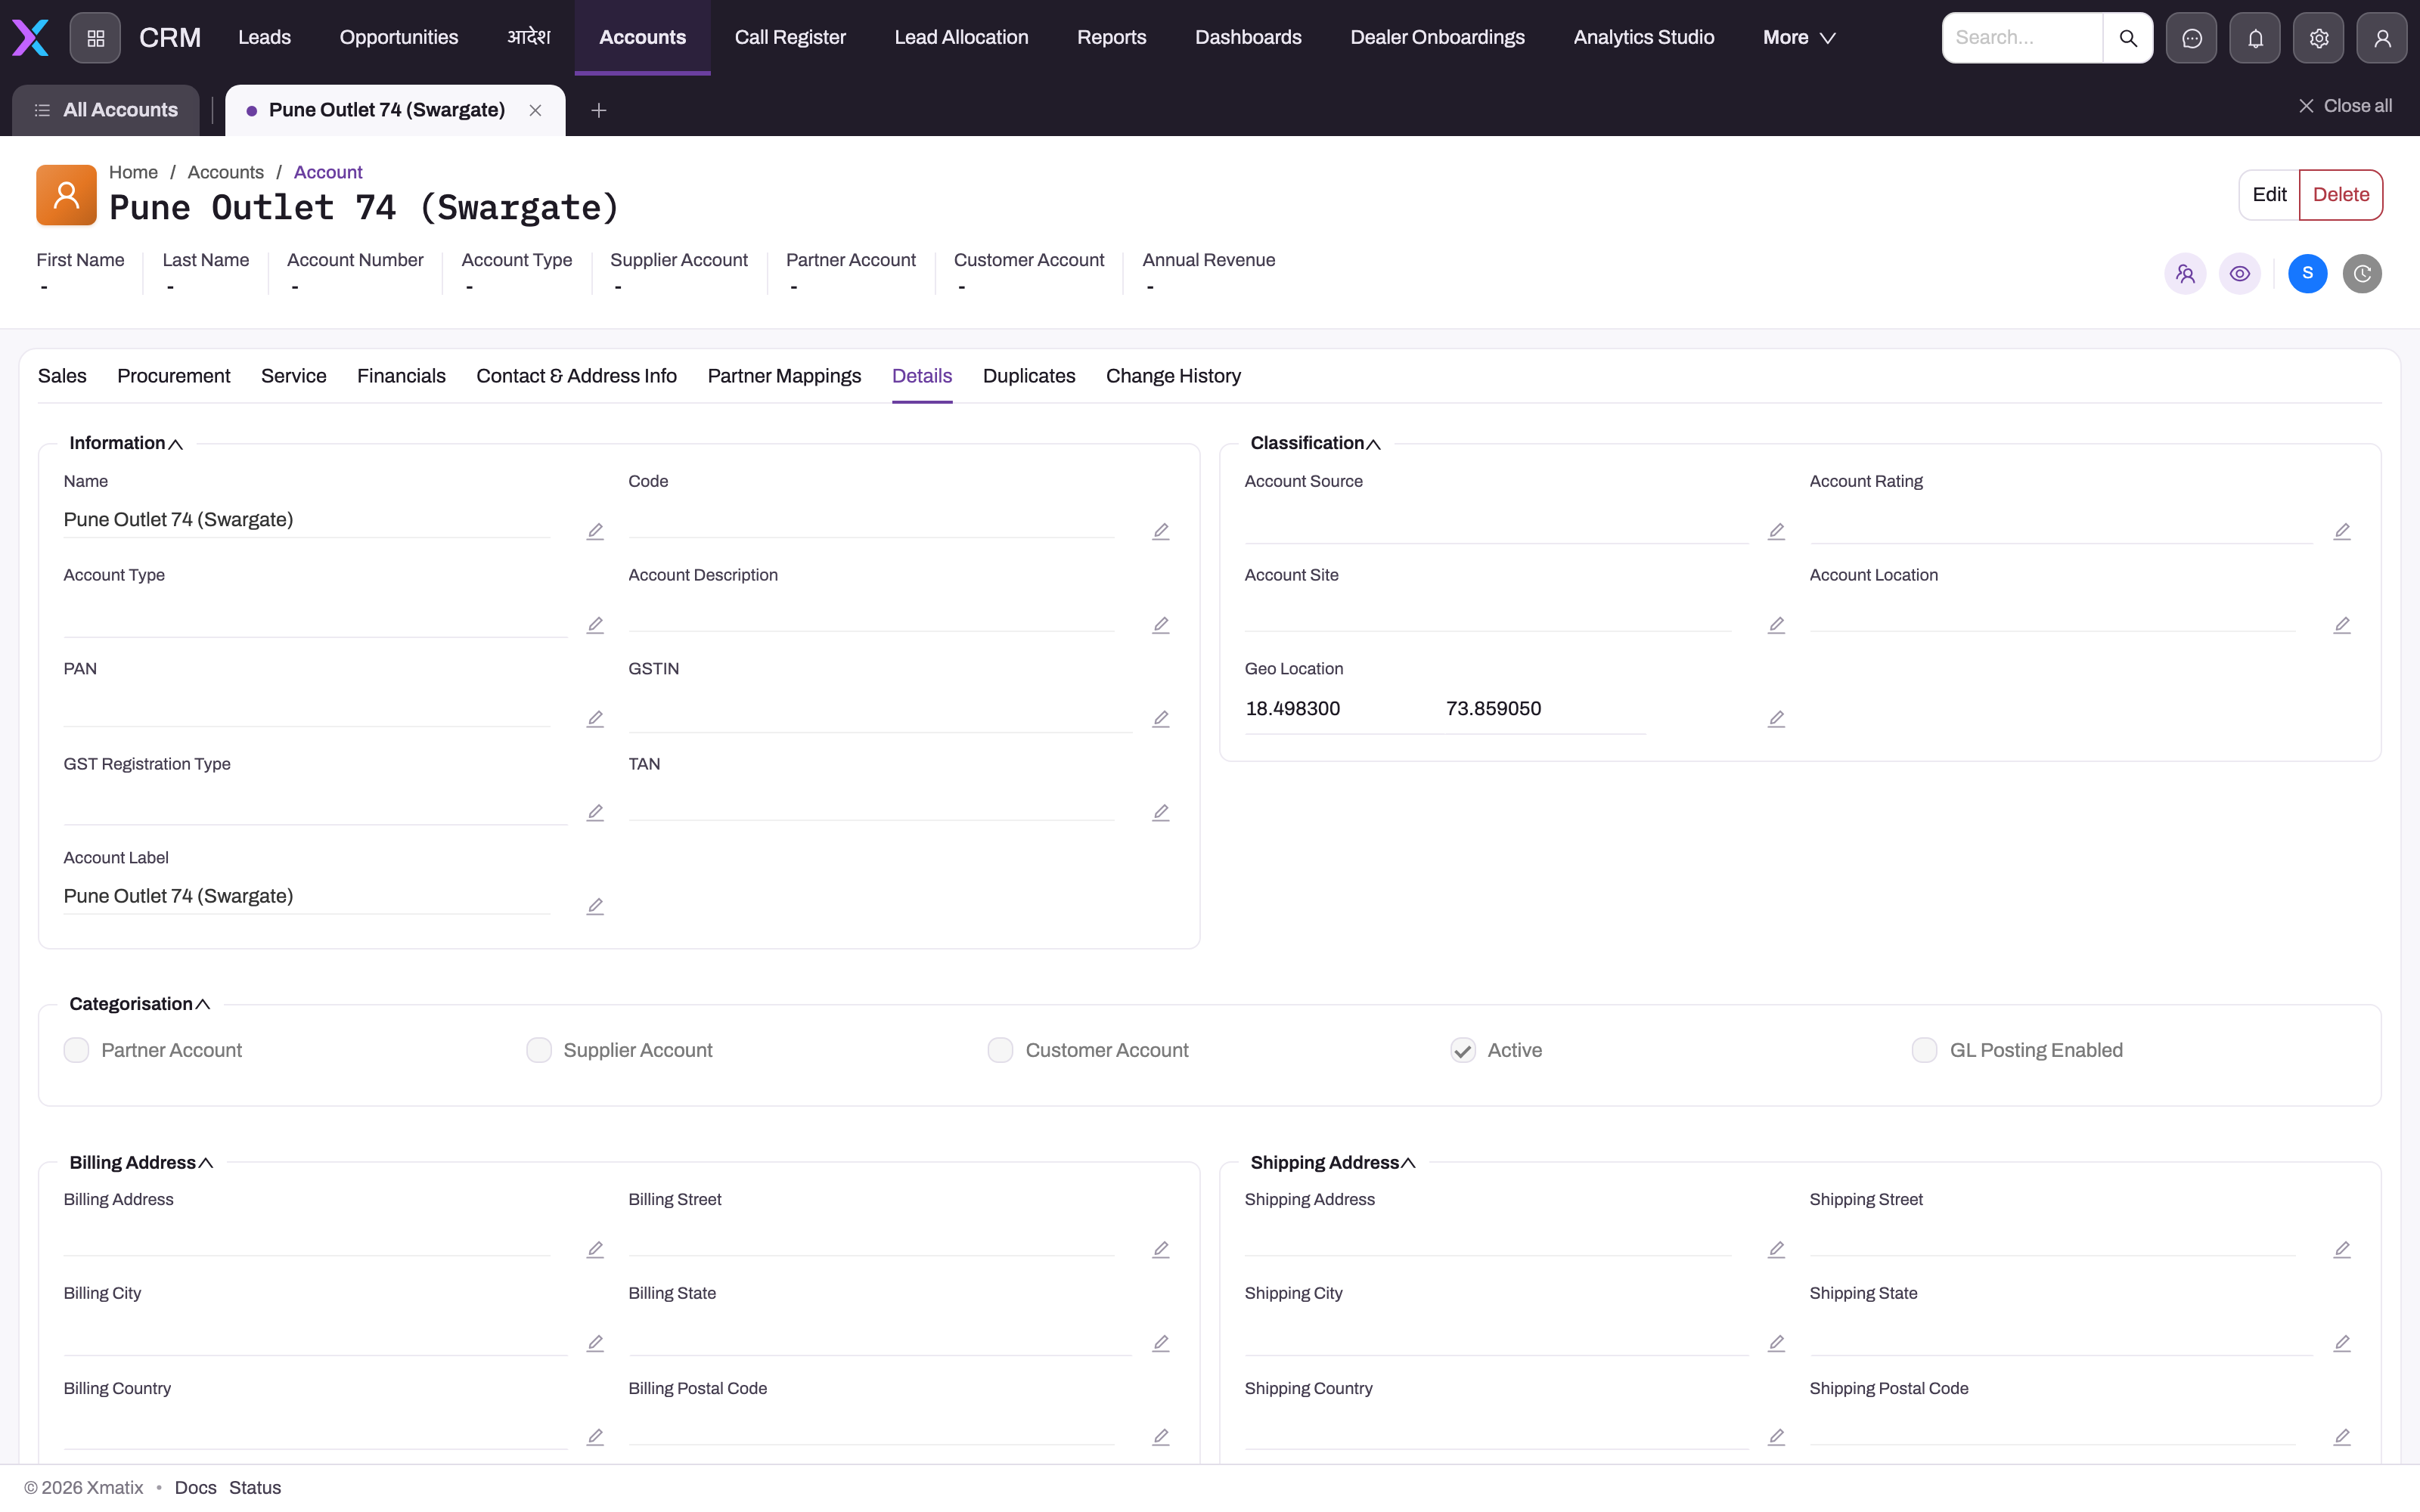
- 1
Details is selected after the related-process tabs.
- 2
Information and Classification restate identity and statutory master fields.
- 3
Categorisation shows the operational roles enabled for the Account.
- 4
Billing and Shipping sections let reviewers compare the two addresses without edit mode.
The Details tab is the read-only consolidated view of the account itself. It groups identity, statutory classification, operational flags, billing address and shipping address so reviewers can verify the current master without opening edit mode. Use it for confirmation and audit; choose Edit only when a value is wrong and you know the authoritative replacement.
Step 14 — Check for likely duplicates
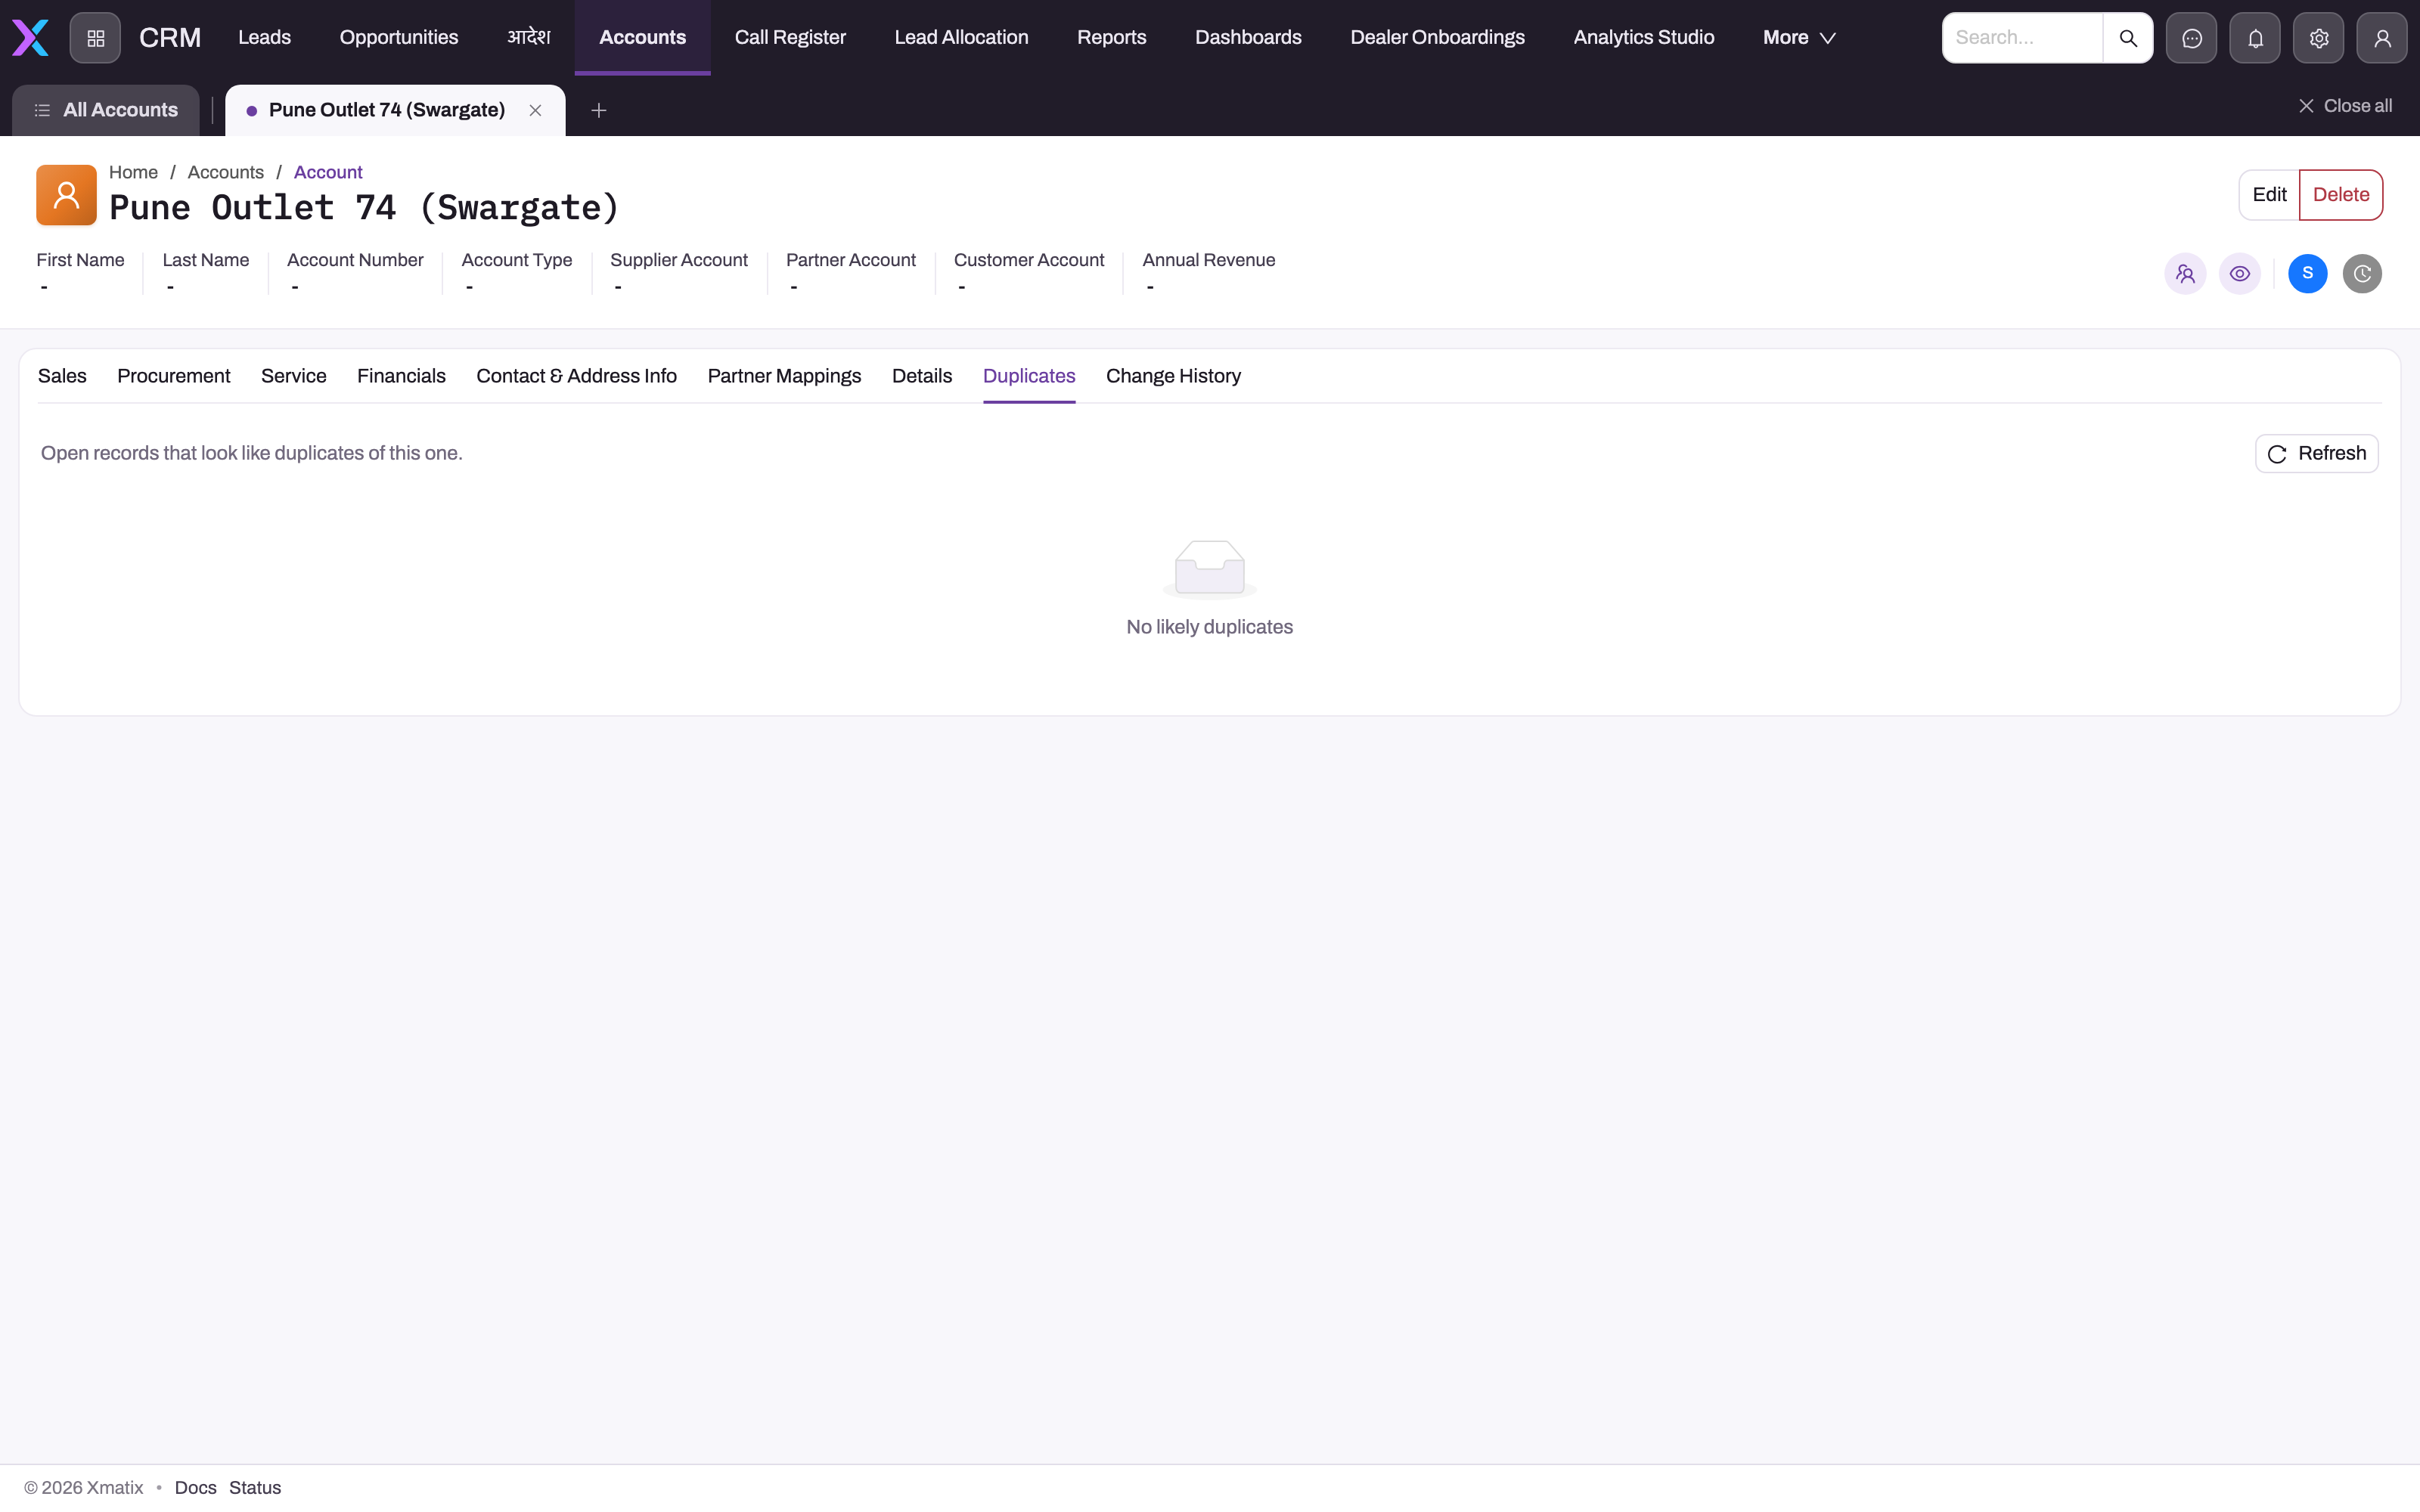
- 1
Duplicates opens the match-review surface for the current Account.
- 2
The explanation clarifies that results are candidate records to inspect.
- 3
Refresh reruns matching after relevant Account data changes.
- 4
No likely duplicates is a successful zero-candidate result, not a loading error.
The Duplicates tab searches for records that resemble the open account. Refresh after significant name, contact or address corrections. A result is a candidate for human review, not proof of duplication; compare identifiers and relationships before merging or deactivating anything. No likely duplicates means the current matching rules found no candidate at that time.
Step 15 — Inspect change history
- 1
Change History is the final Account detail tab in this layout.
- 2
The selected record remains in context while its audit trail loads.
- 3
An empty history area means no visible entries are available under the current history configuration and access.
The Change History tab provides the record's audit trail where history is enabled. Use it to establish what changed, who changed it and when, especially before reversing a surprising master-data value. History explains prior state; it does not replace correcting the current field through the governed edit process.
Expected result
You can move from a populated entity list to a new-record form and then to a saved record's complete detail surface without losing context. Every creation tab has been reviewed before save, and every detail tab is understood as either master data, a related-record workspace or an audit tool. The record's visible data remains internally consistent across sales, procurement, service, financial and contact uses.
Common questions
Why does another entity have different tabs?
Tabs come from that entity's configured layout and relationships. Your tenant can also add custom fields or layouts, so use the same navigation pattern but follow the labels shown in your environment. The individual entity reference explains the platform fields and actions.
Why is an embedded list empty?
An empty embedded list usually means no related record matches the relationship and your access scope. Confirm the account and active view, then check permissions if another authorized user can see records you cannot. Do not create a replacement record merely to make a tab non-empty.