
You invite someone to xMatix by creating their user account. The platform then provisions their sign-in identity in the background and e-mails them their way in — your remaining job is assigning access, because a brand-new account with no security profile can sign in but sees nothing. The whole flow takes a few minutes.
Prerequisites
- The user-administration capability (
setup.security.users.manage) on one of your own security profiles. The built-in SystemAdmin profile includes it. Assigning profiles, roles and teams afterwards usessetup.security.manage; seats usesetup.licensing.admin. - The person's work e-mail address, and a decision on their Audience — Internal for employees, External for portal and partner users. The audience cannot be worked around later: profiles are scoped to Internal, External or Both, and a mismatched profile cannot be assigned.
- The security profile you plan to assign. If your organization enforces license seats, the user may also need seats for anything the profile requires — see Licensing.
Procedure
Step 1 — Check the address is not already in use
Open Setup → Access Control → Users and search for the person's e-mail address. The list shows Display Name, Name, Email, Phone, Audience, Active and Sign-in — Ready (identity provisioned, can sign in), Pending (provisioning still running, within the first minutes after creation), Not provisioned (no identity — cannot sign in) or System (the platform's own service identity, which never signs in and must never be edited). xMatix does not force e-mail addresses to be unique, so nothing stops a second account for the same person — but a duplicate strands the original account's assignments and makes the address ambiguous. If an account already exists, reuse it instead of creating another.
Step 2 — Create the account
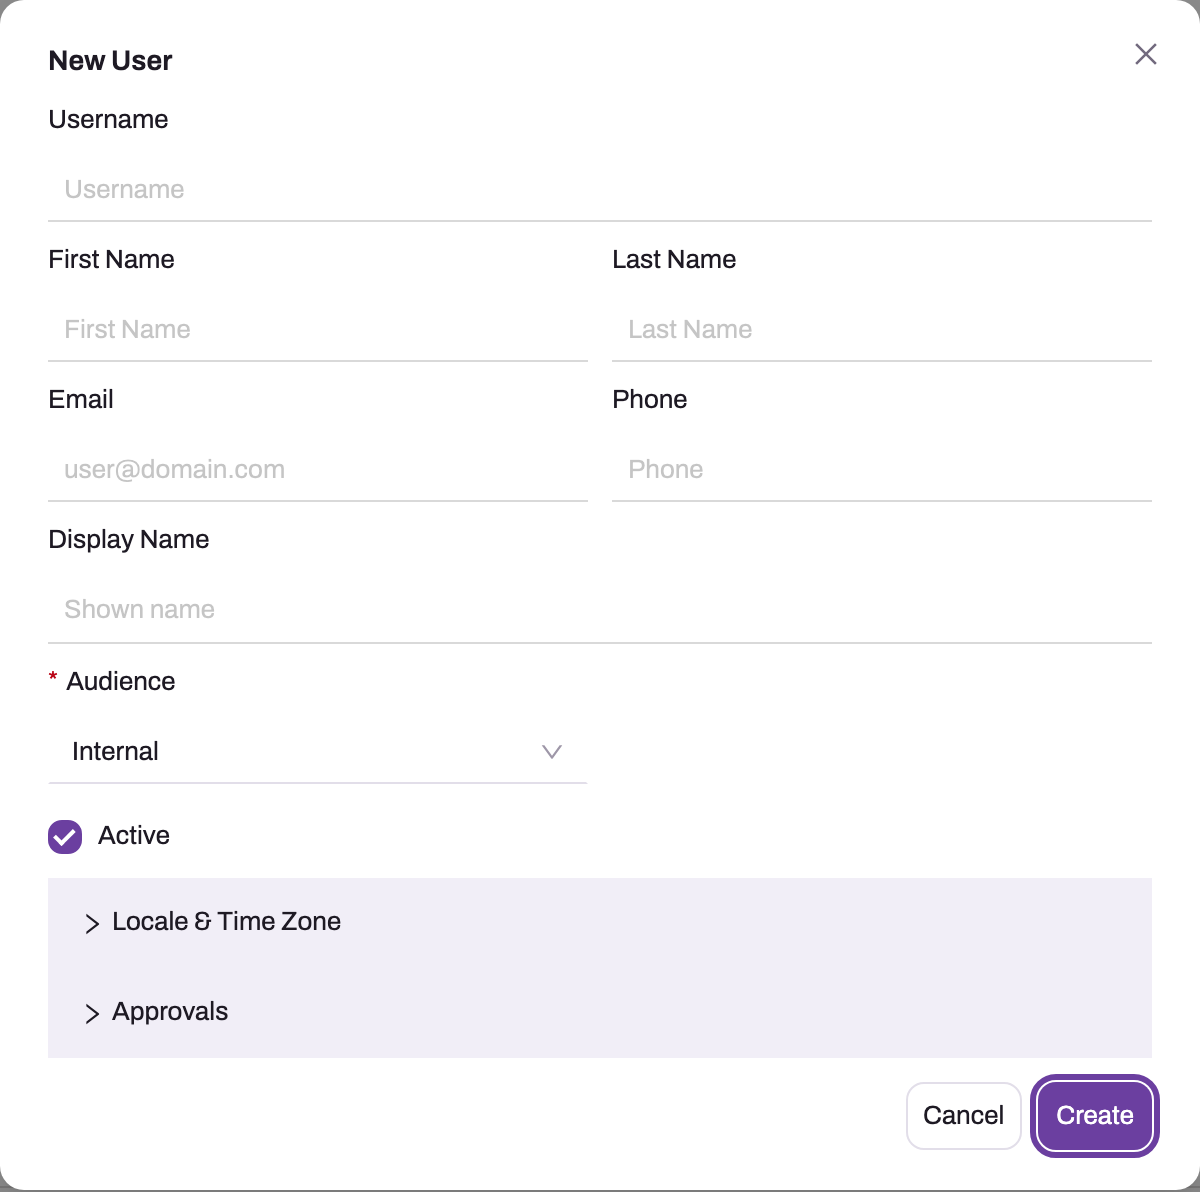
Select New in the page header. The New User dialog asks for:
- 1
Username must equal the e-mail exactly or be a plain name without @ — a different e-mail address is rejected.
- 2
Email receives the set-password or added-to-workspace message; Display Name defaults to first and last name.
- 3
Audience (Internal or External) is fixed for profile matching — an Internal-scoped profile cannot be assigned to an External user.
- 4
Active on means provisioning and the welcome e-mail run at once; turn it off to prepare accounts for a later go-live.
- 5
Locale & Time Zone and Approvals (Delegated Approver) are optional and can be set later.
- 6
Create saves the account; open it next to add a profile on Profile Assignments.
- Username — the sign-in name. It must either equal the Email exactly or be a plain name without
@(letters, digits and. - _ ! # ^ ~, up to 64 characters); a username that is a different e-mail address is rejected in the dialog because the identity provider cannot provision it. Leaving it blank uses the e-mail. - First Name, Last Name, Email, Phone — the e-mail is where the invitation goes. Display Name is composed from first and last name when left blank.
- Audience (required) — Internal or External.
- Active — on by default. Only active accounts are provisioned and e-mailed.
- Locale & Time Zone — optional language, locale and time zone.
- Approvals — an optional Delegated Approver, a user who may act on this user's approval requests.
Select Create. The list shows the new row with Sign-in Pending.
Step 3 — Let provisioning run
Saving an active account queues identity provisioning in the background (it does not appear in the tenant's Jobs list). Within a minute or two Sign-in turns Ready and the person receives one of two e-mails: a set-password e-mail when their sign-in identity is newly created — the link is valid for 72 hours and lands on your organization's set-password page — or an added to your workspace e-mail pointing at the sign-in page when they already had an identity from another organization. Accounts created inactive are not provisioned until you activate them. What the person does next is covered in Signing in to xMatix.
Step 4 — Assign at least one security profile
Open the user (click the row) and add a profile on the Profile Assignments tab. This step is not optional: access in xMatix is allowlist-based, so a user with no active profile sees no apps and no records at all. The profile's audience scope must match the user's audience — a profile scoped to Internal cannot be assigned to an External user (Both fits anyone), and the dialog rejects the mismatch. Effective access is the union of all active profiles, so start with the smallest profile that covers the job.
Step 5 — Add roles, teams, seats and company access as needed
On the same detail page, the Role Assignments tab places the user in the role hierarchy (one role can be marked Primary Role) and the Team Assignments tab adds them to teams — see Roles, teams and business units. License Allocations assigns product, feature and package seats where the profile requires them. In a multi-company organization, also grant access to the companies the user works with, or the access all companies flag; without either, company-scoped records are invisible (tenants and companies).
Step 6 — Verify
Confirm Sign-in shows Ready and, once the person signs in, that a last-login time appears on the account. The user's Access Diagnostics tab computes the effective picture server-side — profiles, roles, teams, business units, licenses and capabilities — and lists, side by side, what the assigned profiles require that the user does not yet hold.
Expected result: the user can sign in and reaches a populated workspace whose apps and records match the assigned profiles, roles, teams and seats.
Common problems
Sign-in stays "Not provisioned". Provisioning did not complete — usually a Username that is a different e-mail address, or a missing e-mail. Fix the fields and save the account again while it is active; any save of an active, unprovisioned account re-queues provisioning.
The welcome e-mail never arrived, but Sign-in is Ready. Saving again does nothing — the e-mail fires once, when the identity is first created. The reliable self-service path is Forgot password on the sign-in page: the identity exists, so a reset gets the person in. If accounts provision but welcome e-mails consistently never go out, the platform's identity e-mail configuration is incomplete — raise it with your platform operator. Never create a second account for the same person to retry an invite.
The set-password link expired. The link is valid for 72 hours. The person should use Forgot password with their work e-mail.
Profile assignment is rejected. The usual causes are an audience mismatch between the profile and the user, or — where seat enforcement is on — missing seats for license grants the profile carries. Allocate the seats first, or assign a profile without license grants.
The person signs in to an empty workspace. No active profile assignment — see Step 4 and Why can't a user see something?.
Common questions
Can the user do anything before a profile is assigned?
They can complete sign-in, but they land in an empty workspace: apps, entities and records are allowlist-based, so nothing is visible until a profile grants it. Treat account creation and profile assignment as one task.
What if the person already uses xMatix in another organization?
Their sign-in identity is reused: provisioning links it to your organization and sends the added-to-your-workspace e-mail — they keep their existing password or passkey. Their access with you is entirely what you assign; nothing carries over from the other organization.
Can I prepare accounts ahead of a go-live?
Yes. Create the accounts with Active off: inactive accounts are not provisioned and no e-mail goes out. Finish profile, role, team and seat assignments in advance, then activate the accounts on go-live day — provisioning runs and the welcome e-mails are sent then, and users land in a working workspace on day one.
Can I resend the invitation?
Not as such. If the account is not yet provisioned, saving it again re-queues provisioning and the e-mail. Once provisioned, the platform never re-sends the set-password e-mail; Forgot password on the sign-in page is the supported route, and it works because the identity already exists.