
An expense claim is the document that gets you reimbursed: one claim, one or more expense lines, receipts attached, routed for approval. When the final approver approves, the claim posts to the books automatically and the amount owed to you is recorded — you then watch it move to paid. This page walks both sides: raising and submitting a claim, and approving one.
Prerequisites
- Access to the Expenses app and the Expense Claim entity through your security profile.
- Your employee record — every claim is anchored on it, and it supplies your manager (for routing), grade (for policy caps) and bank details. If claims cannot find your employee record, ask your administrator.
- An active approval process on expense claims (an administrator sets this up once — see Configuring Expense Management).
Procedure
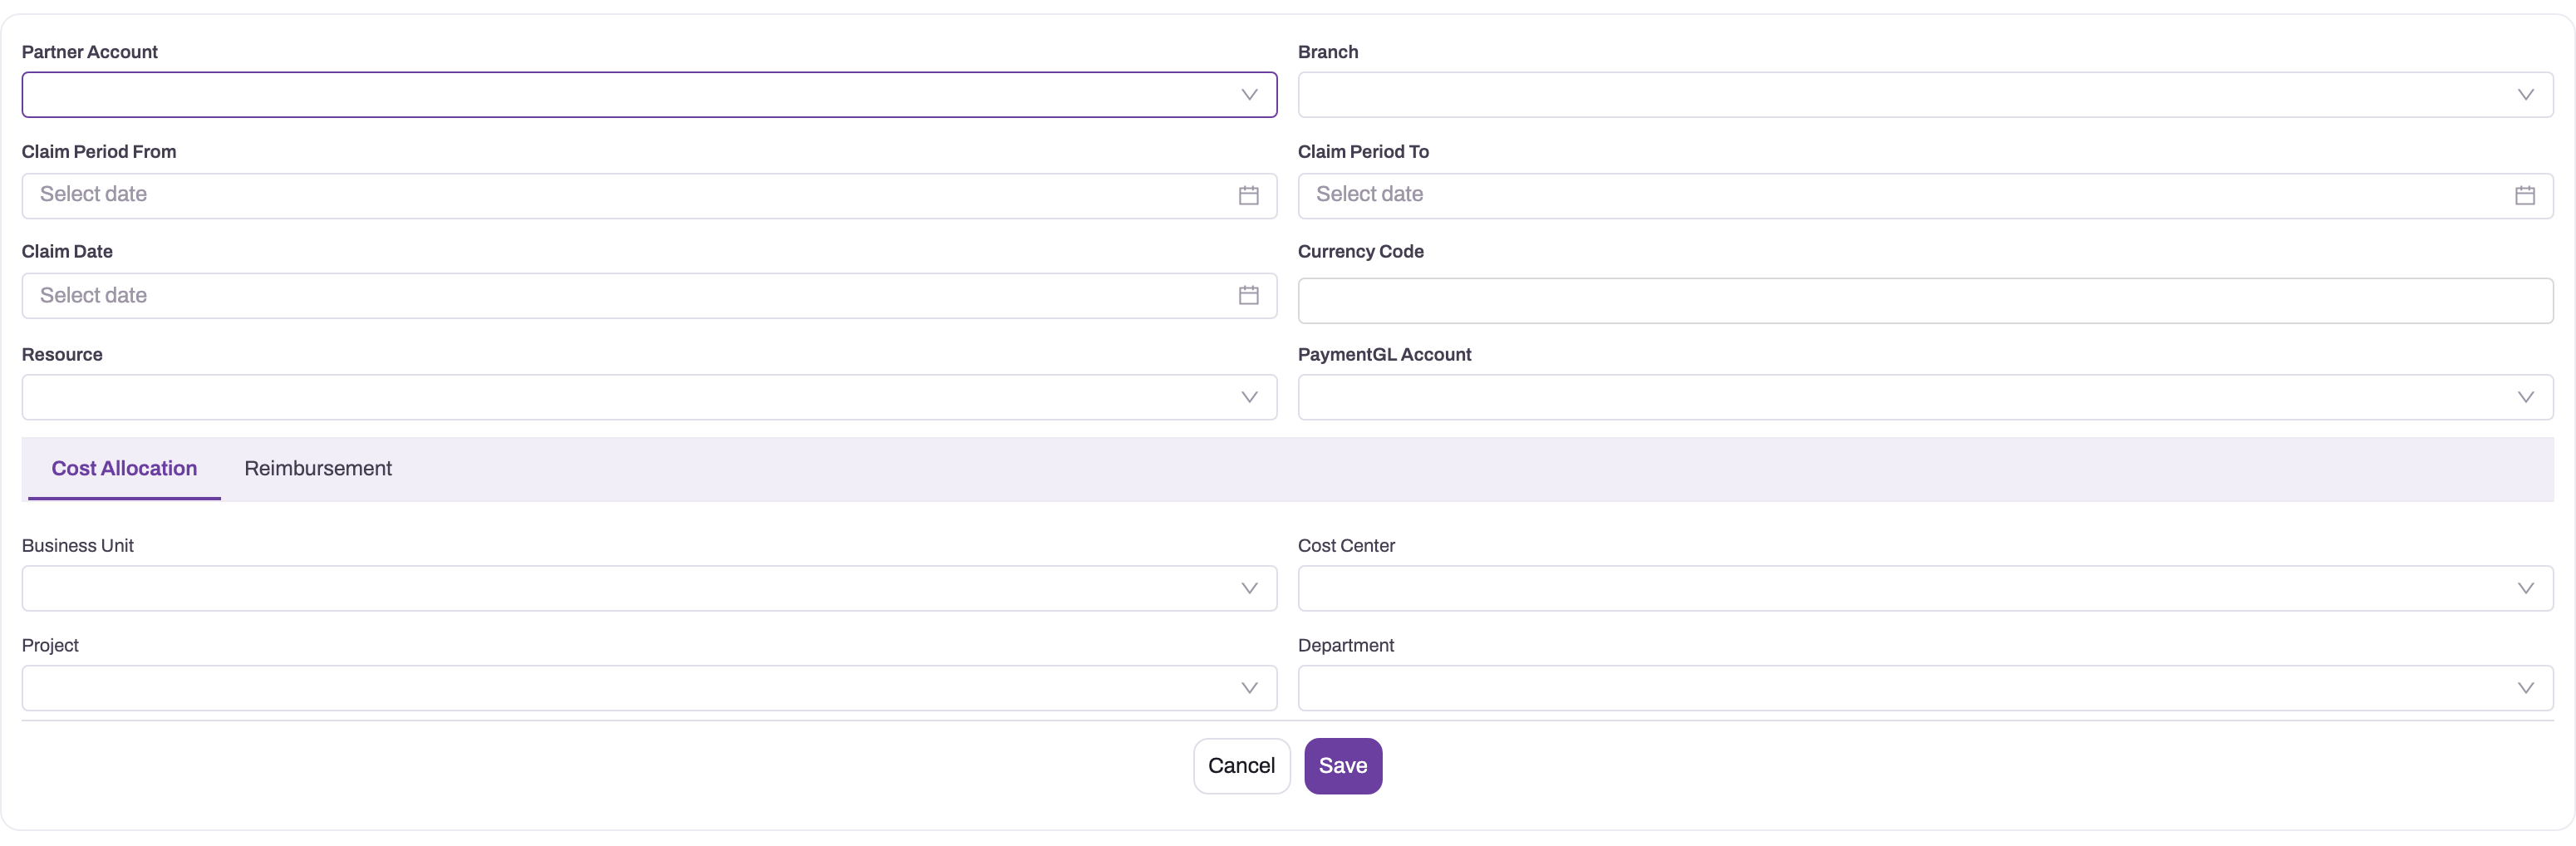
- 1
Claim Period From and To define the business interval covered by this submission.
- 2
Claim Date controls the fiscal period used when the approved claim posts.
- 3
Resource anchors the claim to the employee used for policy and approval routing.
- 4
Payment GL Account supplies the finance-payment destination when applicable.
- 5
Business Unit, Cost Center, Project and Department make the posted spend reportable.
Step 1 — Create the claim
In the Expenses app open Expense Claims and choose New. Confirm the employee resource, claim period and currency, then set the claim date—it determines the fiscal period used at posting. Select business unit, cost center, project or department when required for reporting. Save the header and reopen it before adding lines; verify the claimant is you, the date is in an open period, reimbursement mode is appropriate and no duplicate draft already covers the same period.
Step 2 — Add a line per expense
Add one line per receipt rather than combining unrelated purchases. Select category and amount, then enter expense date, merchant and invoice number exactly as shown; those fields drive duplicate detection. Record payment mode so company-card spend is not reimbursed personally. For GST, verify supplier tax details and mark ITC eligible only with compliant evidence; for rebilling, select the correct customer and approved markup. After saving each line, reconcile currency, tax, disallowed amount and reimbursable total to the receipt.
Step 3 — Attach receipts
Attach a legible bill or receipt to the corresponding line, not only to the claim header. Open the uploaded file and verify merchant, date, amount, tax and invoice number match the entered values and that confidential unrelated information is not included. If policy allows a missing receipt, add the required explanation; otherwise obtain evidence before submission. Confirm every threshold-sensitive line shows an attachment indicator.
Step 4 — Choose how you are reimbursed
Choose Finance payment when Accounts Payable will transfer the open balance, or Payroll when reimbursement must travel through a payslip. Confirm the employee's bank or payroll identity is current and use one mode consistently for the claim. Save and reopen the Reimbursement tab to verify the persisted choice; payroll-mode claims are intentionally refused by the finance reimbursement action later.
Step 5 — Check the claim against policy
Run Evaluate Policy after all lines and receipts are complete; if evaluation also runs at submission, use this earlier pass to correct issues. Review every rule result by line: warnings require acknowledgement, auto-disallowances must reconcile gross to reimbursable amount, higher-approval flags must alter the route, and hard blocks must be resolved. Rerun after changes and verify old violations clear or remain with the expected audit history. Expense policies explains each outcome.
Step 6 — Submit for approval
Before submission, compare line total, tax, disallowed amount, reimbursable amount and attachments one final time. Submit from the Approval Panel and verify the claim leaves Draft, one pending request appears, the correct approver resolves and the record locks where configured. Maker-checker must prevent self-approval. If anything is wrong, use Recall while pending, confirm the request closes, make the correction, rerun policy and submit a new traceable request.
Step 7 — Approve or reject (the approver's side)
Approvers open the request from the inbox, claim panel or mobile and verify claimant, business purpose, allocation, every line, receipt, duplicate signal and policy outcome. Compare requested and reimbursable totals before acting. Approve only the reviewed amount, reject with an actionable reason, or reassign when authority is wrong. After each decision, verify the timeline records actor, timestamp and comment and that a multi-step route advances to the intended next approver rather than finalizing early.
Step 8 — Track it to payment
On final approval, wait for automatic posting and inspect the resulting journal instead of creating a manual booking. Verify expense and eligible input tax debits, employee-payable credit, allocations and total against the approved reimbursable amount. The record should show status Posted, approval Approved and payment Unpaid until settlement. If an advance exists, reconcile its settlement first; then follow the remaining open balance through reimbursement until payment becomes Paid.
Expected result
The claim contains complete dated lines and receipts, policy evaluation records every warning or adjustment, and the configured approvers can follow a complete evidence trail. Final approval posts once to the expected expense, tax and employee-payable accounts, leaving the correct reimbursable open balance.
Common problems
The claim will not submit. A hard-block violation applies — a blocked or deactivated category, a missing mandatory receipt above the threshold, or a duplicate of a line you already claimed. Each violation on the claim names the rule; fix the flagged line and resubmit. If no violation shows, the approval process itself may not have picked the claim up — one pending request per record, and the claim must match an active process.
Part of the claim was not reimbursed. An auto-disallow rule trimmed the excess over a cap — the disallowed amount and the rule are recorded on the line. The trim is deliberate policy, not an error; if the cap is wrong, that is a conversation with whoever owns the policy.
A line is flagged as a duplicate but is not one. Duplicate detection matches merchant, invoice number and amount against this claim and your earlier claims. Two genuinely different purchases can collide when the invoice number is blank on both — fill in the real invoice numbers and re-evaluate.
Approved, but still unpaid. Normal: approval posts the claim and records the payable; payment is a separate finance run. Check the payment status, not the approval status.
Common questions
Can I edit a claim after submitting it?
Not while the approval is pending if the process locks records — which is the recommended setup. Recall the request, edit, and resubmit; or, if the approver rejects or returns it, it comes back editable. Once posted, the claim is in the ledger and corrections follow the finance reversal pattern rather than edits.
Why is my claim tied to my employee record?
Because everything downstream reads from it: your manager for approval routing, your grade for policy caps, your department for spend analysis, and your bank details for payment. One record keeps expenses, HR and payroll telling the same story.
What does the approver actually see of policy?
Every recorded violation — the rule, the line, the message and any excess amount — plus the claim-level flag that says violations exist. Approvers decide with the policy verdicts in front of them; approving a claim does not erase its warnings, which stay on the record for audit.